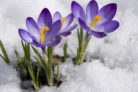
Crocus bulbs are the secret behind one of the most beautiful signs of spring: the crocus flower! But before you see those pops of color in your yard, you’ve got to make sure you’re handling the bulbs correctly. These little guys have some specific needs when it comes to care, but don’t worry—with these tips, you’ll be a pro in no time.
Buying Crocus Bulbs
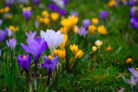
If you’re dreaming of big, show-stopping blooms, here’s a pro tip: look for the biggest bulbs you can find at the garden center. Larger bulbs generally produce the most impressive flowers. The best part? Crocus bulbs are a “one and done” investment. Once you get them in the ground, they’ll naturalize and multiply all on their own year after year.
Quick Tip: As soon as you get your bulbs home, take them out of the plastic packaging so they can breathe!
How to Store Crocus Bulbs
Store-bought bulbs don’t have a very long shelf life out of the ground. If it’s not quite the right time to plant them outdoors, your best bet is to tuck them into a pot. These spring beauties actually do great indoors, too! Whatever you do, try not to leave your bulbs sitting around without soil for more than three days.
Quick Tip: Keep in mind that crocus bulbs are toxic. Make sure to store them somewhere safe, far out of reach from curious kids and pets.
Planting Your Bulbs
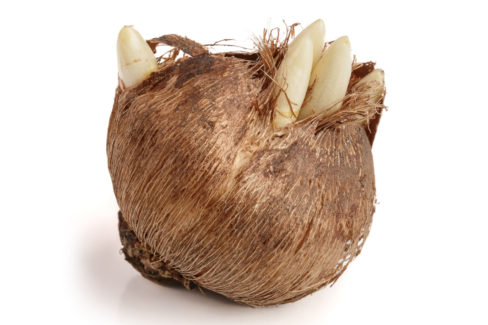
The bulbs you buy at the store are usually pre-treated and ready to go. You don’t need to worry about stratification (cold treatment); you can plant them straight away. If you’re starting them in a nursery pot, keep them in a dark, cool spot for the first few days. Standard potting soil works perfectly fine.
Moving Crocuses Outdoors
The best time to get your crocuses into the garden is actually the fall before you want them to bloom. These bulbs are incredibly hardy and can handle the winter chill. In fact, they actually *need* those freezing temperatures to trigger their blooming cycle.
Fall-blooming crocuses are the exception—they don’t need the cold snap. You plant those in August, and they’ll flower later that same year. For both types, follow these simple steps:
- Pick a spot that gets plenty of sunshine.
- Dig a small hole.
- Make sure the hole is no deeper than twice the length of the bulb.
- Mix a little compost into the soil for a nutrient boost.
- Place the bulb at the bottom of the hole.
- Make sure the root side is facing down!
- Fill the rest of the hole with soil.
- Lightly press the soil down with your foot.
Quick Tip: Planting depth is everything! If you plant them too shallow, the flowers won’t have enough support and might flop over. If you plant them too deep, it’ll take too long for the soil to warm up, and your crocuses won’t get the “wake up” call they need to sprout in the spring.
Helpful Tools
You might have seen “bulb planters” at the hardware store—and let me tell you, they are a total game-changer! These handy tools make planting a breeze. You just push it into the ground, pull the lever to lift out a core of dirt, drop your bulb in, and release the soil back on top. Look for one with a depth scale marked on the side; it makes hitting that perfect planting depth so much easier.