Starting in June, Canna lilies usually show off their spectacular blooms all the way through fall. It’s only after the flowers fade that the plant starts developing its fruit. If you’re the kind of adventurous gardener who loves a good DIY project, growing Cannas from seed is a super rewarding experiment—and that means it’s time for a harvest!
Wait for the fruit to ripen
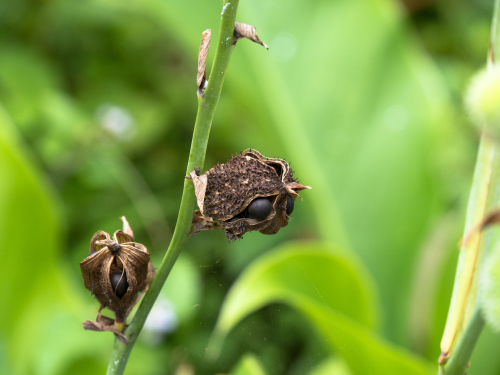
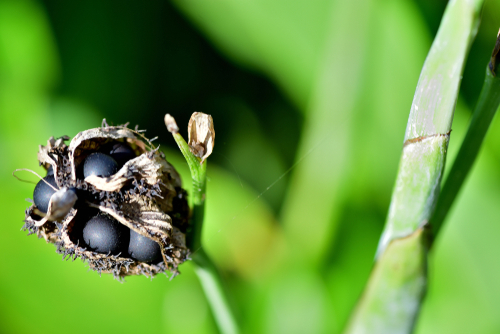
The most important rule here is patience. You’ve got to wait until the Canna fruit is completely ripe before you try to collect the seeds. You’ll know they’re ready when the seed pods look dried out and have actually started to burst open on their own. That’s your cue to open up those bumpy little capsules. Usually, you’ll find two seeds tucked inside each one—they’re roundish-oval and have a deep dark brown or black color.
Getting those seeds to sprout
Now for the tricky part: getting them to germinate. Canna seeds have an incredibly tough outer shell that’s hard for a tiny seedling to break through. To give them a helping hand, you’ll want to “scarify” them—which is just a fancy gardening word for filing them down. Be gentle, though! You want to file just until you see a hint of the white interior, without actually damaging it. You can use:
- A nail file
- Fine-grit sandpaper
- A small metal file
Sowing your seeds in winter
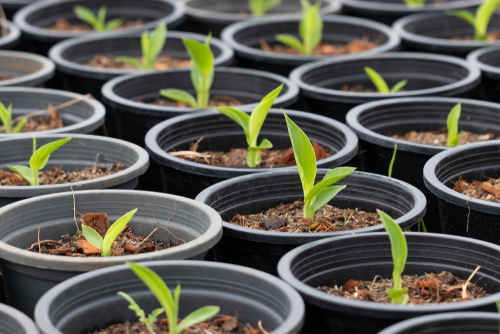
You can get a head start on the growing season by sowing your seeds as early as January. First, let the seeds soak in warm water for about two days to soften them up. Then, tuck them into a pot about an inch deep (2 cm) and find a nice, toasty spot for them—right near a radiator is perfect. Keep the soil consistently moist, and you should see sprouts popping up in about a week. If seeds sound like too much work, don’t worry! You can also propagate Cannas by dividing their rhizomes.