During the peak of summer, mint usually grows like crazy. It’s often more than we can use fresh! But come winter, we hit a bit of a “green gap” because the plants go dormant. That’s exactly why keeping a stash of dried mint is a lifesaver. Here is how you can build up your own homegrown supply.
Harvesting for Maximum Flavor
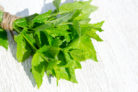
Let’s be real: mint loses a bit of its signature punch when it dries. To make sure your tea or recipes still taste great, you need to start with leaves packed with essential oils. Here’s how to harvest any of your mint varieties for the best results:
- Pick them just before the flowers open.
- Harvest in the late morning once the dew has evaporated.
- Choose a bright, sunny day.
Keep it Fresh and Clean
You’ll want to start the drying process immediately after picking. Try to harvest clean leaves so you don’t have to wash them—washing actually strips away some of those flavorful oils along with the dirt. Just pluck off any damaged or sickly-looking leaves before you get started.
Pro Tip:
If you’re planning on drying mint regularly, I highly recommend planting Moroccan mint. In the right spot, it develops an incredibly intense aroma that holds up beautifully after drying. Plus, it’s also a fantastic variety for freezing.
Your Drying Options at a Glance
Depending on how much you have, the weather, and what gadgets you have in your kitchen, there are a few ways to get the job done:
- Air drying (the classic way)
- In the oven
- Using a food dehydrator
- In the microwave
The Classic Air-Drying Method
- Pluck the individual leaves from the stems.
- Spread them out loosely on a cotton or linen cloth, paper towels, newspaper, or a drying rack. Try not to let them overlap too much.
- Place them in a warm, dark spot to dry. Somewhere between 68°F and 77°F (20-25°C) is perfect.
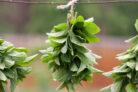
- Alternatively, you can tie two or three stems together in a bundle and hang them upside down from a string.
- Give the leaves a little toss regularly so they dry evenly, and keep an eye out for any signs of mold or rot.
Drying Mint in the Oven
You can also spread your leaves on a baking sheet and dry them in the oven at about 120-140°F (50-60°C). To get the best results, keep these tips in mind:
- If you have a huge harvest, work in small batches.
- Don’t crowd the pan; make sure leaves aren’t overlapping.
- Preheat the oven, let it run for five minutes, then turn it off.
- Only then should you slide the tray of mint inside.
- The leaves should dry in about 20 minutes.
- Flip them occasionally and keep a close eye on them!
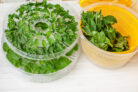
The Gentle Way: Using a Dehydrator
If you own a food dehydrator, this is definitely the way to go. It’s super convenient and very gentle on the herbs. Just follow your manufacturer’s instructions—usually, the lowest setting is plenty for delicate mint leaves. Check on them frequently to see how they’re coming along.
The Microwave Method: For Quick, Small Batches
I’ll be honest: the microwave isn’t the best for preserving flavor. But if you’re in a rush and only have a few leaves, it works in a pinch.
- Spread the leaves on a plate so they aren’t touching.
- Set your microwave to the lowest power setting.
- Heat for a maximum of 10 seconds.
- Check the leaves.
- Repeat in 10-second bursts if they aren’t dry yet.
Storage and Shelf Life
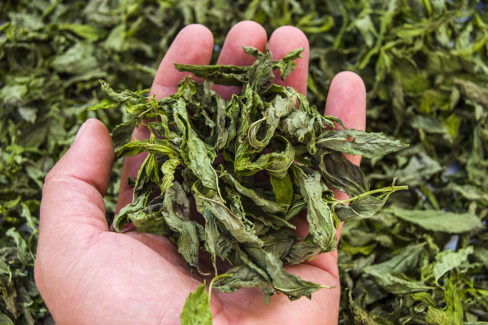
Your mint is officially “done” when the leaves feel crisp and crumble easily between your fingers. If you’re air-drying, this can take up to three weeks. Depending on the variety, the leaves might stay green or turn a bit brown—both are fine!
Store your dried mint in airtight glass jars (avoid paper, as it absorbs the essential oils). Keep the jars in a cool, dark place to store them properly. Your mint should stay flavorful for about 12 months.