Growing your own lemon tree (bot. *Citrus x limon*) from a simple seed is actually a lot easier than you might think! The real trick is finding the right seeds to start with, since not every seed you find is ready to sprout. To give yourself the best shot at success, I recommend gathering seeds from a few different sources.
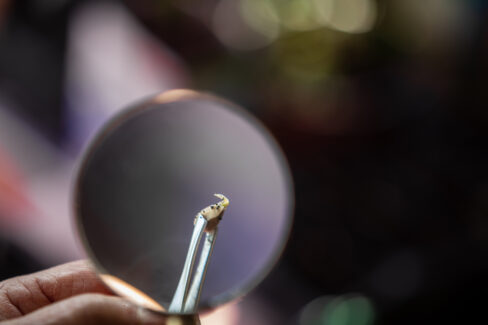
Lemon Seeds
Supermarket Lemons
It’s always a bit of a gamble with lemons from the grocery store. Many commercial growers use sterile varieties because they produce higher yields, which means those seeds might never sprout.
Your odds are much better if you go with organic lemons. These trees are usually allowed to develop naturally, meaning their seeds are much more likely to be viable and ready to grow.
Seeds from an Existing Lemon Tree
If you have access to a homegrown lemon tree, those seeds are almost guaranteed to be fertile. Just a heads-up, though: some trees occasionally produce seedless fruit, so don’t be surprised if you slice one open and find it empty!
Growing Your Plants
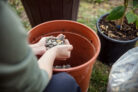
Once you’ve rounded up some good seeds, I suggest planting several at once to increase your chances of success. You can start them all in one large tray or give them their own individual little pots. I personally prefer separate pots—it saves you from having to untangle those delicate little roots later on when it’s time to transplant them.
Step-by-Step Planting Guide
First things first: give your seeds a good rinse under cool running water to get rid of any leftover fruit pulp. This is super important to prevent rot. Then:
- Tuck the seeds into small pots filled with citrus-specific soil or a high-quality seed-starting mix.
- Plant them about half an inch to an inch deep (they need darkness to germinate).
- Mist the soil with a spray bottle.
- Pro tip: You can also pre-moisten the soil before planting—just make sure it’s damp, not soaking wet.
- Cover the pots with plastic wrap to create a mini greenhouse effect.
- If you have a dedicated indoor seed starter kit, that works great too!
- Place them in a warm, bright spot, but keep them out of direct, harsh sunlight for now.
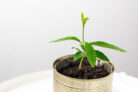
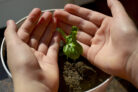
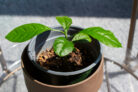
You should see the first little green sprouts popping up in about 7 to 14 days. Once they appear, you can go ahead and remove the plastic wrap.
Ongoing Care
After you’ve taken the cover off, start watering your seedlings carefully. Try not to move them around too much—they like consistency! Once your seedlings have grown into sturdy little plants, they’ll love spending the summer out on the balcony. Just be sure to transition them slowly so they can get used to the direct sun without getting scorched.