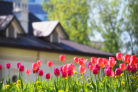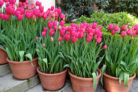
These spring favorites aren’t just for your garden beds—they actually do great in containers, too! If you want a stunning spring display on your porch or balcony, all you need are the right bulbs, the right soil, and a solid pot.
The Right Pot and Soil
When you’re picking out a container for your tulips, keep a few things in mind. Thick-walled pots are great because they act as insulation against the cold. You’ll want something wide enough to give the bulbs space, but not necessarily super tall—shorter pots actually hold up better against those gusty spring storms.
The absolute “must-have” is drainage. Tulips hate “wet feet,” so make sure your pot has one or two drainage holes at the bottom. To keep things running smoothly, place a few shards of broken pottery over the holes and cover them with a bit of landscape fleece. This prevents the soil from clogging the drainage over time.
For soil, skip the heavy garden dirt. Use a high-quality potting mix blended with a bit of coarse sand, or a dedicated container mix. You’re looking for something loose, well-draining, and packed with enough nutrients to get those blooms started.
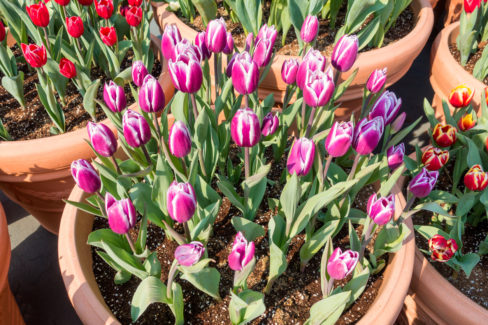
Best Tulip Varieties for Containers
For the best results in pots, I usually recommend varieties that stay under 12 inches tall. Wild tulips and dwarf varieties are perfect—they only grow about 4 to 6 inches high, so they won’t topple over when the wind picks up. Here are a few of my favorites:
- Waterlily Tulips (Tulipa kaufmanniana): These reach about 10 to 14 inches.
- Lady Tulips (Tulipa clusiana): A classic that grows to about 10 inches.
- Multi-flowering Wild Tulips (Tulipa praestans): These stay compact at 6 to 8 inches.
- Whittall’s Tulip (Tulipa whittallii): These get to be about 12 inches tall.
- Turkestanica Tulips: These stay low to the ground and are early bloomers, often popping up in mid-February!
When and How to Plant
Just like in the garden, fall is the time to get your bulbs in the ground (or the pot!). Wait until temperatures are consistently in the 40s (Fahrenheit) so the bulbs don’t sprout too early. They actually need that winter chill to trigger their blooming cycle.
Here’s how to plant them using the “lasagna method” for a full look:
- Prep your pot with a drainage layer at the bottom.
- Fill it with some loose, peat-free potting soil (or your sand/soil mix).
- Place your taller tulip varieties in first. Make sure the pointy ends are facing up and the bulbs aren’t touching each other.
- Cover them with a layer of soil that is about twice as deep as the bulbs are tall.
- Now, tuck in your wild or dwarf tulip bulbs.
- Add the final layer of soil—again, aim for a depth of at least twice the height of the bulbs.
- Press the soil down firmly and give them a good drink of water.
Winter Protection
Since pots don’t have the earth to insulate them, the soil inside can freeze much faster than the ground. However, don’t bring them inside! They need the cold to bloom. Instead, keep them outdoors but give them a little “winter coat.”
Place your pots on a piece of wood or Styrofoam to insulate them from the cold pavement, and tuck them against a protected wall of your house. Wrap the pot in burlap, fleece, or even bubble wrap. For an extra layer of coziness, you can cover the top of the soil with some evergreen branches.