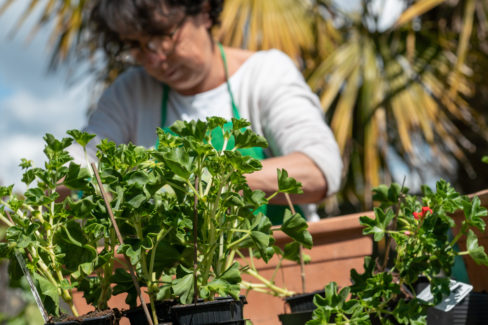
If you have a particularly stunning geranium, why not grow a few more? During the summer, these plants put out lush new growth that is perfect for taking cuttings. It’s a super easy way to grow new plant babies that are identical to the parent plant. I’ve put together a quick guide on the simple steps you need to take to expand your garden for free.
The Best Time for Propagation
August is the sweet spot for taking cuttings, though you can still get away with it in the first half of September. Just a quick heads-up: when we talk about “geraniums” in the gardening world, we usually mean *Pelargoniums* (originally from South Africa), not the hardy perennial Cranesbill (*Geranium*). By late summer, they are right in the middle of their blooming season. For propagation, pick the healthiest plants that are blooming the most vigorously.
Pro Tip:
Many folks buy new geraniums every year because they don’t have room to store big pots over the winter. Taking cuttings is a great budget-friendly alternative! Young cuttings take up almost no space when overwintering indoors.
How to Cut and Prepare Your Cuttings
Look for healthy, semi-ripe side shoots that are about the thickness of a finger. Try to find stems without flowers or buds if possible. Avoid very soft, green stems, as they tend to rot before they can grow roots.
- Aim for a cutting length of about 4 inches (10 cm).
- Make sure the cuts are clean and smooth.
- Always use sharp, sterilized garden shears or a knife.
- Cut just below a leaf node (the bump where leaves grow).
- Strip off the lower leaves and any small flower buds.
- Leaving one pair of large leaves at the top is plenty.
- Let the cuttings air-dry for about two hours before planting.
Pro Tip:
Did a stem snap off during a summer storm? Don’t toss it! You can use wind-broken stems for propagation too. Just make sure to trim the jagged break into a clean, smooth cut just below a leaf node.
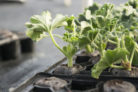
Planting Your Cuttings
- Fill small starter pots (with drainage holes!) with a seed-starting mix, which helps those delicate new roots develop. Standard potting soil works in a pinch, too.
- Plant one cutting per pot. Poke a hole with a pencil or dibber and insert the stem about an inch (2 cm) deep.
- Gently firm the soil around the stem and give it a good drink of water.
- Cover each pot with a clear plastic bag to create a mini-greenhouse (just remember to vent it daily so it doesn’t get moldy).
- Place the pots in a warm, sheltered spot with indirect light. If the nights are getting chilly, move them inside to a bright windowsill.
- Keep the soil consistently moist, but be careful not to overwater—you don’t want them sitting in a swamp.
Caring for Your Young Geraniums Over Winter
After about 4 to 6 weeks, you’ll see new leaves sprouting. That’s your sign that the roots have successfully taken hold! Since these little guys can’t handle frost, they’ll need to spend the winter indoors. Here’s how to keep them happy:
- Keep them in a bright spot, but avoid harsh, direct sunlight.
- The ideal temperature is between 50°F and 60°F (10-15°C).
- Keep them away from hot radiators or heating vents.
- Water sparingly and hold off on the fertilizer for now.
- In February, repot them into a larger container.
- Switch to a nutrient-rich potting soil at this stage.
- Gradually move them to a warmer, brighter spot to wake them up.
- Start fertilizing about six weeks after repotting.
- Wait until mid-May (after the last frost) to move them outdoors permanently.
- Don’t forget to “harden them off” by slowly acclimating them to their new outdoor home over a week or two.