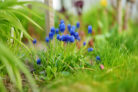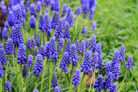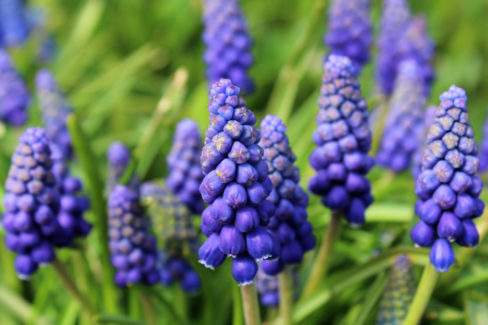
Is there anything more magical than seeing a vibrant blue carpet spread across your lawn in early spring? Around mid-March, Grape Hyacinths (also known as *Muscari*) burst into bloom, enchanting gardeners with those iconic, deep blue clusters. If you want to bring even more of this charm to your yard, you’re in luck—propagating them is a breeze. Here’s the lowdown on how to get more of these beauties in your garden.
Different Ways to Propagate
Multiplying your Grape Hyacinths is a simple project that even beginner gardeners can tackle with success. You’ve basically got two main methods to choose from, or you can just sit back and let the plants do all the heavy lifting themselves!
Let Nature Do the Work
For my fellow “lazy gardeners” out there, you’ll love how independent Grape Hyacinths are. Left to their own devices, they’ll happily spread via the wind. In fact, being *too* tidy in the garden can actually stop them from spreading. If you trim back the yellowing leaves and spent blooms in the summer, you’re cutting off their chance to self-seed.
Of course, sometimes you *want* to limit their spread. Keep in mind that Grape Hyacinths are toxic, so if you have curious kids or pets playing on the lawn, you might want to keep their growth in check.
Pro Tip: Self-seeding only happens if the plant is truly happy in its location!
Controlled Sowing
If you’d rather have a say in where your new flowers pop up, follow these steps for sowing seeds:
- Collect the seeds during the summer months.
- You can sow them immediately in the fall or store them until next spring.
- Plant them directly outdoors.
- Remember, these are “cold germinators,” meaning they need a period of chilly weather to wake up.
- Don’t bury them too deep—just a light dusting of soil and a quick watering will do.
Pro Tip: Don’t expect flowers right away! It takes quite a while for a Grape Hyacinth grown from seed to produce its first bloom.
Propagating with Offset Bulbs
If you’re looking for the fastest and most reliable results, offset bulbs (or “bulblets”) are the way to go. These little baby bulbs develop right next to the mother bulb during the summer. Here’s how to handle them:
- Carefully dig around the plant to expose the offset bulbs.
- Gently detach them from the main mother bulb.
- Lift the new bulbs out of the soil with care.
Pro Tip: When you replant these little guys, try to keep them relatively close to the mother plant—about 4 inches apart is perfect. The soil is key here, too: make sure it’s loose, nutrient-rich, and well-draining so the bulbs don’t get “wet feet” and rot.