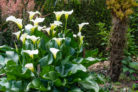
The Calla Lily isn’t just a gorgeous addition to your living room; it’s also a total showstopper in the garden. And here’s a pro tip: you don’t have to spend a fortune on fully grown plants at the nursery. Growing your own Callas from scratch is actually pretty easy!
Two Ways to Get Your Callas Growing
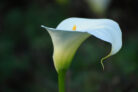
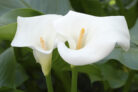
The Calla Lily (officially known as *Zantedeschia*) originally hails from South Africa. Even though the weather there is a far cry from what we have here in the States, these beauties are surprisingly adaptable. When it comes to starting your own, you’ve basically got two options:
- Sowing seeds
- Planting bulbs (rhizomes)
I’ll be honest with you—starting from seeds is a test of patience. It can take years before you see those iconic blooms. If you want results faster (and who doesn’t?), planting bulbs is the way to go. You can tuck them into garden beds or brighten up your patio with containers.
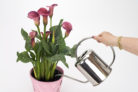
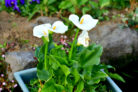
Planting Callas in Pots and Containers
If you’re planning on keeping your Calla as a houseplant or a patio feature, spring is your best friend. Aim to plant between March and May. If the plant is going to live year-round in a heated room, you can even get a head start in February or wait until fall.
For the soil, standard potting mix works just fine, but I like to mix in a little sand. Callas aren’t super picky, but the sand helps with drainage so the roots don’t get soggy. When you’re ready to plant, look at the bulb: make sure the “eyes” (the pointy bits) are facing up and the rounded side is facing down.
Bury the bulb about two to three inches deep. Give it a really good soak—keep watering until the air bubbles stop rising. Just make sure the pot can drain freely so the bulb doesn’t sit in a puddle.
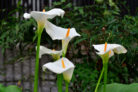
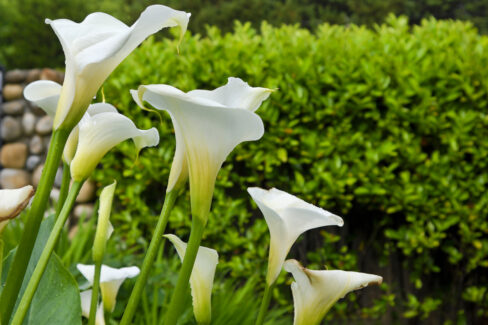
Moving Your Callas Outdoors
Since Callas are big fans of warmth and definitely *not* fans of frost, wait until the danger of a late freeze has passed before putting them in the ground. In most regions, this means waiting until mid-May. While you could technically plant them as early as March, it’s risky. A better move is to “pre-grow” them indoors in early spring and then transplant them outside once the weather stays warm.
When it’s time to move your indoor starts to the garden, be gentle! You don’t want to hurt those delicate roots. I find it easiest to tilt the pot sideways and gently wiggle the soil loose. Then, just cradle the bulb with your fingers and lift it out carefully.
Planting in the garden follows the same rules as the pot: about two inches deep. Pick a sunny spot that’s protected from harsh winds. Once they’re in the ground, give them a good drink of water to help them settle in!