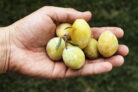
A mirabelle plum tree is a total game-changer for any backyard. Not only do they look gorgeous, but they also reward you with a bounty of juicy, sweet fruit every summer. If you’re thinking about adding one to your garden, don’t sweat it—getting them started is actually pretty straightforward if you follow a few simple steps.
First things first: Picking the right variety
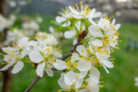
Before you grab a shovel, you’ll want to pick the perfect variety for your space. The “best” one really depends on what you’re looking for and what your local climate is like. One huge plus? Most mirabelles are self-fertile, meaning you don’t necessarily need a second tree nearby for pollination.
The ‘Nancy’ mirabelle is a classic fan favorite for a reason. It’s a hardy variety that produces tons of small, flavorful fruit, and the Nancy mirabelle is known for being a pretty fast grower. If you’re looking for something with larger fruit, ‘Migrande’ is an excellent choice. And if you’re the impatient type who wants an early harvest, you might want to go with ‘Bergthold.’
Finding the perfect sunny spot
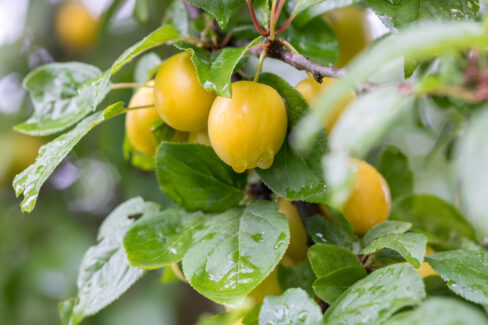
Mirabelles are sun-worshippers. To get the best crop, pick a spot that gets plenty of direct sunlight. While they can handle light partial shade, less sun usually means fewer plums. Plus, that sunlight is what really develops the sugar and aroma in the fruit! You’ll also want to find a spot that’s a bit sheltered—think near a house wall, a sturdy fence, or a tall hedge—to protect it from harsh winds.
Keep in mind that these trees like their personal space. A mature mirabelle can have a canopy spread of up to 13 feet. To let it really thrive, try to clear an area of about 200 square feet so it has room to branch out.
How to plant your tree: A step-by-step guide
The best time to get your tree in the ground is either in the spring or the fall. Here’s how to do it right:
- Dig a hole that is at least twice as wide and twice as deep as the tree’s root ball.
- Mix some organic compost into the soil you just dug out to give the tree a nutrient boost.
- If your soil is heavy or clay-like, mix in a little sand to help with drainage.
- Fill some of that enriched soil back into the hole. When you set the tree in, the “graft union” (that bump on the lower trunk) should sit about four inches above the ground level.
- Fill the rest of the hole with soil, packing it gently around the roots.
- Double-check that your tree is standing straight—now is the time to fix any leaning!
- Drive a stake into the ground and loosely tie the tree to it to help it grow tall and stay upright while it gets established.
- Give your new tree a long, generous drink of water.