Watching a tiny cactus seed transform into a magnificent, prickly friend is one of those little miracles of nature that gardeners of all ages can enjoy. Plus, let’s be real: cacti are some of the most low-maintenance and toughest plants out there. The best part? Growing them from scratch in your own home isn’t complicated at all—you definitely don’t need a degree in botany to pull it off. In this step-by-step guide, I’ll show you exactly how to start your own cactus collection from seed.
Cactus Sowing: Getting Prepped
If you want to give your cactus seeds a serious head start, a little “pre-soak” goes a long way in boosting germination. Here’s a pro tip: pop your seeds into an empty tea bag and let them soak for about 45 minutes in a thermos filled with hot water (aim for around 130°F or 55°C). This helps wake the seeds up and gets them ready to sprout.
Cactus Sowing: Choosing the Right Soil
When it comes to these desert dwellers, you want to stick to purely mineral-based substrates. Materials like perlite or fine lava rock are perfect because they ensure those delicate little roots get the perfect balance of air and water. While you might be tempted to use standard potting mix, it’s usually not stable enough for the long haul and can lead to mold issues. Stick to the gritty stuff for the best results!
Cactus Sowing: The Step-by-Step Process
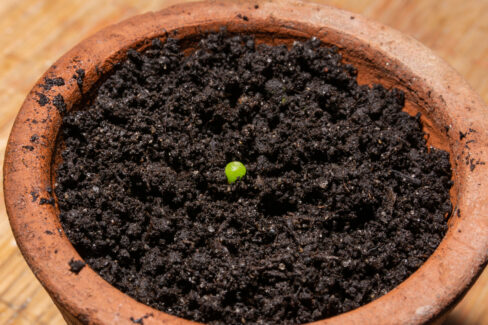
Once your soaked seeds have had a chance to dry off on a piece of paper towel, grab a small starter pot (about 1.5 x 1.5 inches is plenty for up to 30 seeds) and fill it with your substrate. Mist the soil with lukewarm water until it’s nice and moist. Now, you’re ready to plant:
- Spread the seeds evenly across the surface and press them down very gently.
- Lightly dust a thin layer of lime-free quartz sand over the seeds and give them one more quick mist.
- Don’t forget to label your pot! Jot down the cactus variety and the date you planted them.
- Place the pot inside a germination box or a clear plastic container. Keep the lid closed, leaving just a tiny crack (about the width of a matchstick) for airflow.
- Find a warm spot for your mini-greenhouse and make sure to mist the seedlings regularly so they don’t dry out.
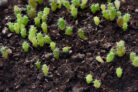
Once your little guys start to sprout and reach about half an inch (1 cm) in diameter, they’re ready to be moved to their own pots. Usually, this happens between 12 and 14 months. Just remember: the older and sturdier the seedling, the better it will handle the move!