Watercress is a total superstar in the garden, mostly because it’s such a versatile powerhouse in the kitchen. If you want a constant supply of those fresh, peppery leaves, the good news is that it’s super easy to grow your own—whether you have a big backyard or just a sunny windowsill. There are just a few key things you need to keep in mind to get it right.
Different Ways to Grow Your Watercress
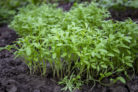
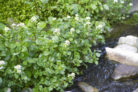
When picking a spot for your watercress, think “cool and damp.” It loves partial shade and absolutely craves moisture. In fact, the wetter you keep it, the happier and tougher it’ll be—even if the sun gets a little intense.
You’ve got a few great options for getting started:
- Growing it in pots (perfect for patios or kitchens!)
- Sowing seeds directly in your garden or even right in a water feature.
Getting Your Hands on Seeds
To get your crop started, you can grab a packet of seeds at your local garden center, or if you (or a neighbor) already have some plants, you can harvest your own for free.
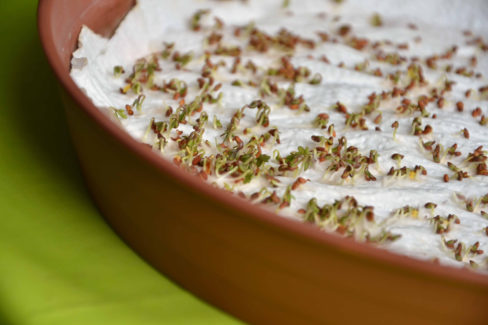
The seeds develop inside little bean-shaped pods that appear after the flowers fade. Once the seeds are ripe, the pods dry out and pop open. Just collect them and let them dry thoroughly. If you store them in a dark, cool place, they’ll stay good until next spring.
Sowing the Seeds
You can start your seeds in a tray or pot indoors, or head straight out to the garden. If you’re planting directly outside, though, be warned: birds think these seeds are a delicious snack! You might want to use a little netting to keep them safe.
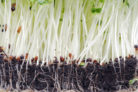
One very important tip: watercress seeds are “light germinators.” This means they need light to wake up, so don’t bury them under a thick layer of dirt. Instead, just gently press them into the soil with your finger. Keep that soil consistently moist and try to keep them in a spot that’s around 68°F (20°C).
If you’re planting directly outdoors, it’s best to wait until after the last frost—usually around mid-May—to make sure the babies don’t get nipped by the cold.
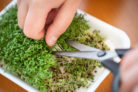
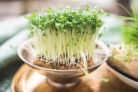
You should see those first little sprouts popping up in about two to three weeks. Once they’re big enough, you can thin them out or move them into their own pots. If you started yours indoors, this is the time you can finally transplant them out into the garden. Happy planting!