Growing your own berries at home is actually a lot easier than you might think! And trust me, there is nothing quite like the taste of a sun-ripened berry picked straight from your own backyard. To get that perfect harvest, you need the right spot in the garden, but you also need to stay on top of your fertilizing game to make sure your plants have all the nutrients they need to thrive.
Store-Bought Berry Fertilizers
You don’t necessarily need a different bottle for every single type of berry; most commercial berry fertilizers are formulated to work for the whole family. While you *could* technically use a standard flower fertilizer in a pinch, your plants will really thank you for using something specifically tailored to their needs—especially when harvest time rolls around. These specialized mixes are great for all the berry varieties you might be growing, including:
- Raspberries
- Blackberries
- Blueberries
- Strawberries
- Currants
- Gooseberries
- Goji berries
- Elderberries
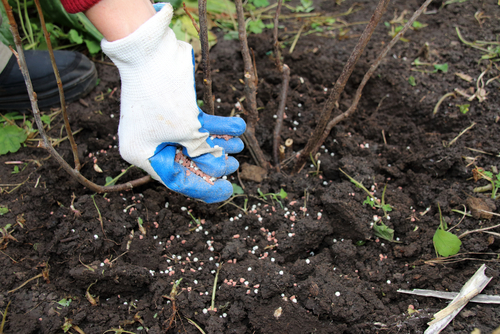
Most berry fertilizers are built around three main ingredients: Nitrogen, Phosphorus, and Potassium (you’ll often see this labeled as “NPK” on the bag). Some brands also toss in a bit of Magnesium for extra health. You can find these in liquid form, granules, powders, or pellets. If you’re looking for a “set it and forget it” approach, solid fertilizers (like granules) are the way to go. They act as a slow-release food source, breaking down gradually into the soil over time.
Liquid fertilizers, on the other hand, are often more precisely balanced and act quickly. You just mix them into your watering can and you’re good to go. The trade-off? You’ll have to apply them more often since they don’t last as long, and they tend to be a bit pricier. As a rule of thumb: use slow-release solids for berries planted in the ground, and stick to liquid feeds for your container-grown berries.
The Case for Natural Fertilizers
You don’t have to go the chemical route if you don’t want to. In fact, too much nitrogen can actually backfire—it makes the plant grow tons of lush green leaves, but leaves it with no energy to produce actual flowers and fruit! That’s why I’m a big fan of natural alternatives.
When you first put your plants in the ground, try mixing in some mature compost or horn shavings to enrich the soil. Well-rotted manure (especially horse manure) is another fantastic organic option. If you want to DIY a liquid fertilizer, you can make “compost tea” or a stinging nettle steep. These homemade brews are packed with nutrients and are very budget-friendly.
Don’t Forget the Mulch!
Mulching is a total game-changer, especially for strawberries. By spreading a layer of mulch, you keep the berries off the damp dirt, which prevents them from rotting before you can pick them. Clean straw or bark mulch works wonders for this. Plus, mulch helps keep the roots nice and hydrated during those scorching summer months.
Pro tip: Get that dry mulch down just before harvest time. Once the season is over and you’ve picked the last of the fruit, you can switch to mulching with grass clippings. It’ll break down over the winter and improve your soil quality for next year!