If you’re looking to brighten up your garden with some fall color, chrysanthemums (or “mums,” as we like to call them) are the absolute gold standard. You can grab blooming bushes at the nursery in the fall, or if you’re a DIY gardener, you can start with young plants in the spring. Just a heads-up: those babies need a little extra TLC to get them ready for their big autumn debut. You can even try your hand at propagating them yourself!
Caring for Young Plants
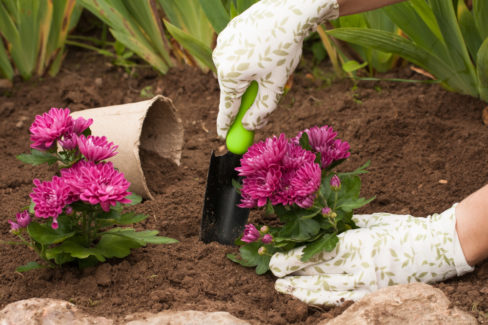
When you buy young mums, they usually come in small pots. Keep them in a bright spot, but out of direct, scorching sunlight for now. If you’re still getting frost at night, only bring them outside during the heat of the day. Once late May rolls around and the frost risk is gone, they can stay outside for good. If you’re dealing with perennials, I’d recommend waiting until their second year to plant them directly in the ground—they need to toughen up a bit to survive a cold winter.
Annual mums, on the other hand, can go straight into the garden beds in May. Just keep in mind they’ll say their goodbyes once the blooming season is over.
Growing Your Own Mums
Want to expand your collection without spending a fortune? You can easily grow your own young plants from seeds or stem cuttings.
Starting from Seed
You can sow seeds directly in the garden in the fall, or start them indoors in trays starting in February. Mums are “cold germinators,” meaning the seeds need a chilly period to wake up. If they’re outside, winter takes care of that for you. For indoor starts, pop the seeds in the fridge for a few weeks first. Plant them about 3/4 of an inch deep in seed-starting mix and keep the soil moist. Place the trays in a bright, sheltered spot between 57°F and 68°F. Once the seedlings are big enough to handle, you can transplant them into individual pots.
Growing from Cuttings
In the spring, you can take 4-inch cuttings from healthy shoots that don’t have buds yet. Here’s the play-by-play:
- Cut the stem at an angle near the base.
- Strip off all the leaves except for the top two.
- Dip the cut end into some rooting hormone.
- Plant the cuttings in pots filled with a low-nutrient seed-starting or herb mix.
- Place the pot in a bright spot (no direct sun!).
- Keep the soil consistently moist.
- Pro tip: Cover the pot with a plastic bag to create a mini-greenhouse, but make sure to lift it daily for some fresh air.
Your cuttings should take root in about four weeks. Once you see new growth, it’s time to move them to a permanent pot. Make sure the pot has good drainage—I like to put some broken pottery shards at the bottom. Use a mix of two parts potting soil to one part sand, and keep it moist. Keep them in a warm, bright spot out of direct sun. By the second year, your “new” mum will be sturdy enough to move into the garden!