Summer is finally here, and if your herb garden is anything like mine, it’s probably exploding right now! If your marjoram is growing like crazy, don’t let all that incredible flavor go to waste. The good news is that you can easily save that summer goodness for the winter months. However, when it comes to freezing versus drying, there’s actually a pretty big difference in how much flavor you’ll get in the end.
Why drying beats freezing for marjoram
Marjoram is one of those herbs packed with essential oils. The secret to preserving it correctly is keeping those oils as concentrated as possible. For marjoram, drying is definitely the way to go. While you might lose a tiny bit of punch, it’s barely noticeable—especially if you harvest it at its peak.
Freezing, on the other hand, tends to zap a lot of the spice and can even diminish some of those healthy herbal benefits. Plus, thawed marjoram leaves look… well, a bit mushy and unappealing. It’s still perfectly edible, so I won’t tell you *never* to freeze it, but it’s definitely not my first choice.
How to harvest and prep your marjoram
Once you’ve planted your seeds, your marjoram should be ready to go in about two months. For everyday cooking, you can just snip off the top third of the stems whenever you need them. But if you’re looking to stock up for winter, I recommend doing one big harvest on a sunny morning right before the plant blooms. That’s when the flavor is most intense!
Pro tip: If it rained the day before, your leaves are already clean. Avoiding a pre-drying wash helps keep the aroma strong and prevents mold from moving in while the herbs dry. Just give them a quick look-over and pull off any leaves that don’t look 100% healthy.
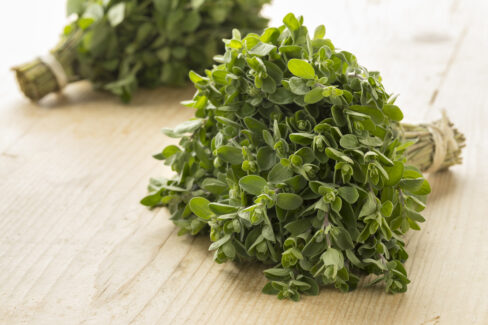
The best way to dry marjoram
Keep the stems whole while drying to lock in that flavor. You’ll want to wait until they are completely crisp before stripping the leaves off and crumbling them.
- Bundle about ten stems together with twine and hang them upside down.
- Find a spot that’s airy, bright (but not in direct sun), and warm—either indoors or in a shaded outdoor area.
- They should be dry in about 14 days.
- If you’re in a hurry, you can use your oven at 100°F (40°C).
- Don’t flip them! Just leave the oven door cracked open a bit.
- A food dehydrator on a low setting also works like a charm.
Once they’re dry, store your marjoram in a glass jar with a tight lid. Keep it in a dark, dry cupboard, and it’ll stay flavorful for about a year.
If you really must freeze it…
If freezing is your only option, here’s how to get the best results:
- Pre-freeze the stems whole after cleaning.
- Or, chop them up and freeze them with a little water in an ice cube tray (this is great for dropping straight into soups!).
- Feel free to mix in other herbs for a custom blend.
- Once frozen solid, transfer the stems or cubes into a freezer bag.
- Don’t thaw them! Toss them directly into your cooking pot while still frozen.
- Use them within a year.
Quick Tip:
Another fantastic way to keep that marjoram flavor alive is by making a DIY herb oil. A fresh pesto will also stay good in the fridge for several weeks. Just keep in mind that marjoram is pretty sensitive to the cold, so it won’t survive the winter indoors for fresh harvesting.