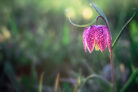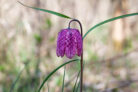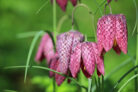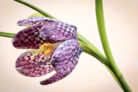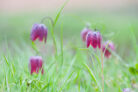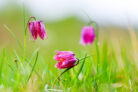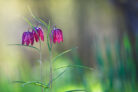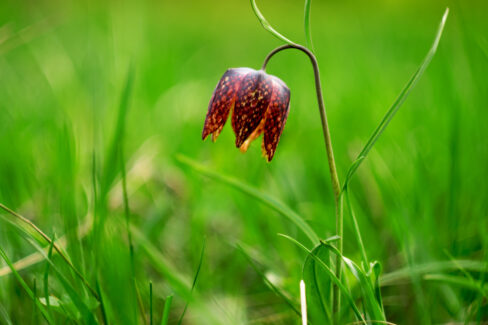
The Checkered Lily—also known as the Snake’s Head Fritillary—is a total spring showstopper with its unique, bell-shaped nodding flowers. Whether you want to brighten up your garden beds or add some flair to your balcony, you can get these beauties started using either pre-grown potted plants or dormant bulbs.
Planting
When it comes to planting the Checkered Lily (botanically known as *Fritillaria meleagris*), you’ve got two main options:
- Pre-grown potted plants
- Flower bulbs
Pre-grown Potted Plants
You’ll usually start seeing potted Checkered Lilies in garden centers around late February or early March. My big tip? Get them in the ground as soon as possible. These plants are super sensitive to drying out, so they need a steady supply of moisture to stay happy.
Planting in the Garden
Checkered Lilies are a bit picky about their “home.” They thrive in soil that is:
- Consistently moist
- Fresh
- Well-draining
- Nutrient-rich
- Slightly acidic to neutral
In a standard garden bed, normal soil works fine as long as it drains well. If you’re dealing with heavy clay, definitely mix in some sand to loosen things up. The absolute best spots are sunny, damp meadows or right along the edge of a garden pond.
Here’s how to get them in the ground:
- Gently lift the plant out of its nursery pot.
- Shake off any excess old soil.
- Place it in the planting hole.
- Space them about 4 to 8 inches apart (aim for roughly 25 plants per square yard for a lush look).
- Fill in with soil.
- Give them a good watering.
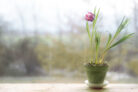
Potting Them Up
If you want to keep your Checkered Lilies in containers, make sure your pot has at least one drainage hole at the bottom. Standard potting soil for flowering plants works great. Once you’re ready, follow these steps:
- Create a drainage layer at the bottom using gravel or broken terracotta shards.
- Cover that with a thin layer of soil.
- Set your lily in the pot.
- Fill in the gaps with more soil.
- Water thoroughly.
Flower Bulbs
If you’re starting from scratch with bulbs, September is the sweet spot for planting. Don’t let them sit around on the counter, though—these bulbs dry out fast, so try to get them in the dirt right after you buy them.
Preparing the Soil
A little prep work goes a long way in helping your lilies thrive:
- Loosen the soil about a spade’s depth down.
- Clear out any stones, weeds, or old roots.
- Mix in some compost or organic fertilizer (like horn shavings) to boost the nutrients.
Setting the Bulbs
To give your lilies room to breathe—and space to grow “baby” offset bulbs—keep about 6 to 8 inches between each planting hole. Here’s the play-by-play:
- Dig your hole.
- Depth: 3 to 4 inches deep.
- Width: About twice as wide as the bulb itself.
- Add a thin layer of sand at the bottom (this acts as a “safety net” against rot).
- Place the bulb in the hole.
- Fill it back up with soil.
- Press down lightly to settle the earth.
- Water them in.
- Mark the spot so you don’t accidentally dig them up later!
- Keep the soil consistently moist.