With their lush, dense needles, yews are basically a dream come true for topiary lovers. One of the most popular looks for this evergreen is the classic globe shape. If you’re looking to add some structured greenery to your yard, here’s a guide on how to prune your yew into a perfect sphere and what you need to keep in mind to stay safe.
The Secret to Success: Prune Twice a Year
Yews are famous for being slow growers. On the plus side, that means they’re low-maintenance—you won’t be out there with shears every other weekend. On the downside, their slow pace means they aren’t very forgiving if you get a little too “scissor-happy.” Bare patches take a long time to fill back in, so the golden rule is: don’t overdo it.
The best times to prune are:
- The Hard Prune: A frost-free day in early spring.
- The Shape-Up: A day in late summer.
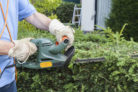
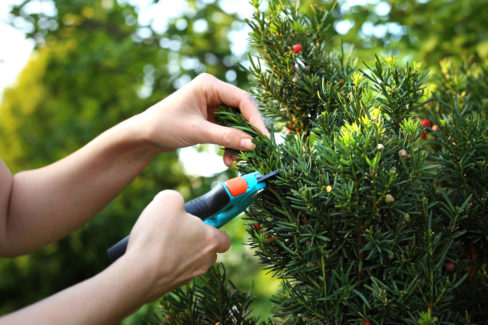
For a sharp-looking topiary, I recommend a two-step approach. In the spring, before the new growth starts popping out, grab your electric hedge trimmers for a “base cut.” This is when you can take off a bit more material to set the structure. Then, in late summer, go back in for a light trim to tidy up the shape and keep it looking crisp.
Safety First: Suit Up!
Here’s something really important: yews are toxic. The wood and the needles contain a substance called taxine. It’s not just dangerous if eaten; it can also cause nasty skin rashes or allergic reactions just by touching it. When you prune, the cut needles and branches release this toxin.
Don’t take any chances—wear your protective gear. Put on sturdy work gloves, wear safety glasses, and make sure you’ve got long sleeves and long pants on before you start clipping.
How to Get That Perfect Globe Shape
Unless you have the steady hand of a master sculptor, trying to “freehand” a perfect sphere is pretty tough. Save yourself the headache and use a guide. You can buy pre-made topiary templates at a garden center, or get crafty and cut a semi-circle out of a piece of plywood to use as a stencil. Another pro tip? Wrap a piece of wire around the bush to mark your “equator” and trim everything that sticks out.
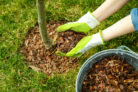
Once you’re done, you can actually compost your yew clippings. Just make sure to shred them first and keep your compost pile covered while they break down.