Once your serviceberry (also known as Juneberry or Amelanchier) is settled in the right spot, it’s usually a “set it and forget it” kind of plant. But life happens—maybe you’re redesigning your yard or realized it’s getting a bit too crowded. The good news? Moving a serviceberry is totally doable as long as you keep a few key tips in mind.
When your serviceberry outgrows its space
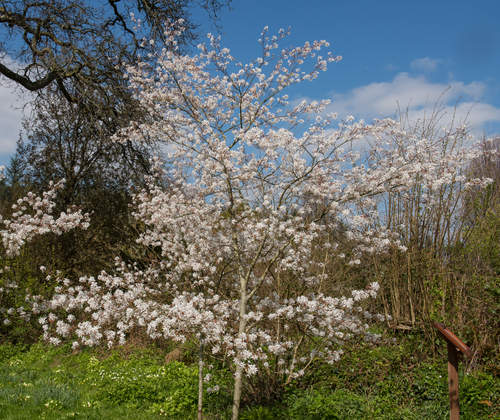
When you pick up a young serviceberry at the nursery, it’s hard to imagine that little sapling turning into a massive focal point. Depending on the variety and your local conditions, these beauties can reach up to 30 feet tall! Of course, there are dwarf varieties that stay compact without much fuss, but if you have a standard type that’s getting too big for its britches, moving it is often better than reaching for the shears.
Here’s the thing: serviceberries can be a bit dramatic when it comes to heavy pruning. Unlike many other garden shrubs or fruit trees, they don’t always “bounce back” visually from a radical haircut. A bad prune can leave the plant looking awkward for years. If it’s outgrowing its spot, your best bet is to find it a new home where it has room to shine.
When is the best time to transplant?
For the most part, serviceberries are pretty hardy souls, and that includes how they handle being moved. Technically, you can transplant them any time the ground isn’t frozen, but for the best results, aim for spring or fall. You definitely want to avoid moving them during the scorching heat of mid-summer or during a winter deep freeze. If you’re growing a serviceberry in a container, plan on repotting it every three years or so. Refresh the soil and move it up to a larger pot if the roots are starting to feel cramped.
How to transplant your serviceberry like a pro
The secret to a successful move is keeping that root ball as intact as possible. Think of it like moving a “potted” plant—the less you disturb the roots, the happier the tree will be. Grab a sharp spade and cut a circle into the soil about 20 inches (50 cm) away from the trunk all the way around. While losing a few tiny hair roots isn’t the end of the world, you want to make sure those main, thicker roots stay attached.
Carefully lift the tree out of the hole and move it gently to its new home. Try to keep as much original soil clinging to the roots as possible to prevent them from drying out during the transition. Dig a hole at the new site that’s plenty big enough, set the tree in, and fill it back up with loose, high-quality soil. Loose soil is key because it makes it so much easier for those roots to stretch out and get established.
A few extra pro-tips for the road:
- Give the plant a deep soak before you start digging it up.
- Water it thoroughly immediately after it’s in its new spot.
- If your soil is heavy clay, consider adding a drainage layer at the bottom of the hole to keep the roots from getting “wet feet.”