If you’re looking to give your elderberry bush a change of scenery, there are a few things you’ll want to keep in mind to make the move a success. With a little prep work and the right timing, your elderberry will settle into its new home without a hitch. Here’s everything you need to know about transplanting elderberry like a pro!
Timing is Everything
To keep stress levels low for your plant, it’s best to move it while it’s still in its winter nap. Aim for a late winter day when the ground isn’t frozen and the sky is a bit overcast—your elderberry will thank you for the gentle transition.
Preparation is Key
Don’t wait until moving day to get started! About a month before you plan to transplant, follow these steps to prep the plant:
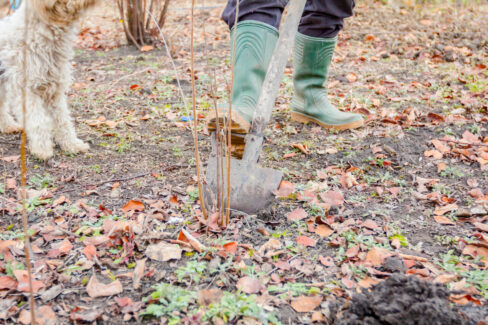
- Use a spade to cut a circle into the soil all the way around the root ball.
- Give the roots a deep, thorough soaking for about an hour.
- Use a garden fork to carefully loosen the root ball.
- Give the plant a good pruning to reduce its size.
How to Transplant Your Elderberry
When moving day finally arrives, head over to the new spot and get the soil ready:
- Loosen the soil nice and deep.
- Clear out any rocks, weeds, or old roots.
- Dig a hole that’s about twice as wide as the elderberry’s root ball.
- Mix some compost and horn meal (or a similar organic fertilizer) into the soil you dug out.
- Carefully lift the plant from its old spot, keeping as much soil attached to the roots as possible.
- Pro tip: Have a friend help you slip a burlap sack over the roots for transport.
- Team up to lift the shrub into a wheelbarrow and head to the new location.
- Plant it at the same depth it was growing before, then fill the hole back in with your enriched soil.
- Give it a very generous watering.
- Finish things off with a nice layer of wood mulch to hold in moisture.
Post-Transplant Aftercare
Once your elderberry is in its new home, keep a close eye on the water. You want the soil to stay consistently moist, but be careful not to let it get waterlogged. As soon as you see fresh green growth in the spring, you’ll know your transplant was a total success!