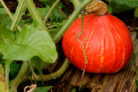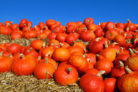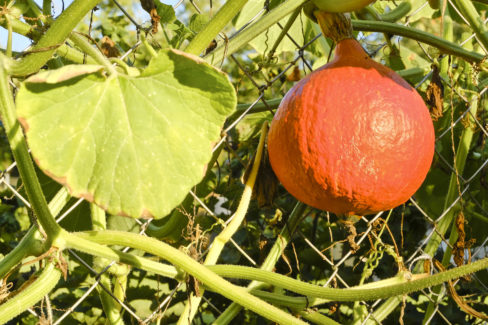
Hokkaido pumpkins are a fan favorite in the veggie patch, and for good reason! With their vibrant orange skin, they don’t just look stunning—they taste incredible, too. If you’re looking to add some homegrown Hokkaido to your kitchen table, follow my guide to get your patch started.
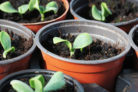
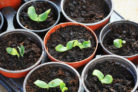
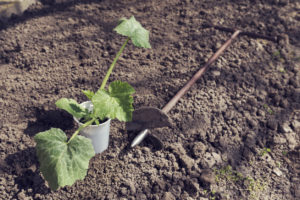
The Young Plants
You can definitely start your own seeds indoors or pick up some starts at your local nursery. You’ll usually see young plants hitting the shelves around mid-May. When you’re shopping, look for starts that look sturdy and healthy.
Pro Tip: While you can direct-sow Hokkaido seeds right into the garden, you have to wait until mid-May anyway. This usually pushes your harvest back by about four weeks. Personally, I recommend transplanting young plants to get a head start on the season!
Fall Bed Prep
Pumpkins are what we call “heavy feeders.” This means they need a ton of water and nutrients to reach their full potential. They’re happiest in rich, loamy soil packed with organic matter.
If you can, start prepping your bed the previous fall. Sowing a “green manure” (cover crop) in September works wonders. The dense plant cover protects the soil from drying out and keeps weeds at bay, while the roots help loosen things up. Once winter hits, the leaves will freeze and create a natural mulch, or you can mow them down in the spring to use as mulch then.
Green Manure
Try sowing legumes as your cover crop. These amazing plants actually “fix” nitrogen from the air into their roots, making it available for your pumpkins later. Think clover, lupines, or even peas and beans.
If you prefer to dig your bed in the fall, go ahead and turn some well-rotted manure into the furrows. Digging is great for aerating the soil, especially if you’re dealing with heavy clay.
Spring Planting Prep
Before planting, make sure to enrich your soil with plenty of compost.
Spring prep starts with loosening the soil and working in your fertilizer. Aged cow, chicken, or horse manure is fantastic for this. Just a heads-up: never use fresh manure! It’s too “hot” and will burn your plants’ roots. It needs to be aged for at least a year.
If you don’t have manure handy, blood meal, bone meal, or other organic fertilizers are great alternatives to give your Hokkaido a boost. Just follow the instructions on the bag. You can also find manure pellets at the garden center—they’re super easy to handle and less messy!
Location, Location, Location
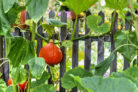
Once the bed is ready, it’s time to plant. Keep in mind that a single pumpkin plant needs about 30 to 40 square feet to roam. They really need their own dedicated space! If they’re crowded, they’re more prone to diseases like powdery mildew, especially during humid summers. Plus, slugs love hiding under that dense canopy and can do some real damage.
Pumpkins are sun-worshippers—they need full sun to thrive. They’ll tolerate partial shade, but they’ll definitely struggle in full shade. A popular trick is planting them next to a compost pile so the vines can shade the heap, but I don’t recommend planting *directly* on the compost. Those hungry pumpkins will suck all the nutrients right out of it!
Pro Tip: If you have a patch of land you want to keep weed-free, pumpkins are your best friends. Their massive leaves create so much shade that weeds don’t stand a chance.
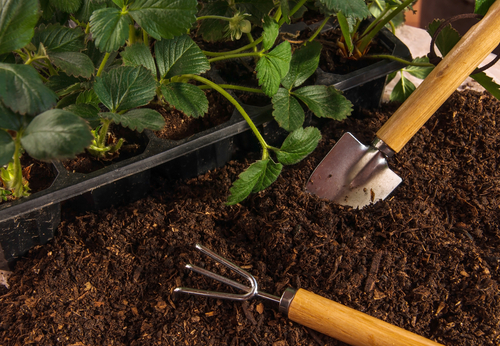
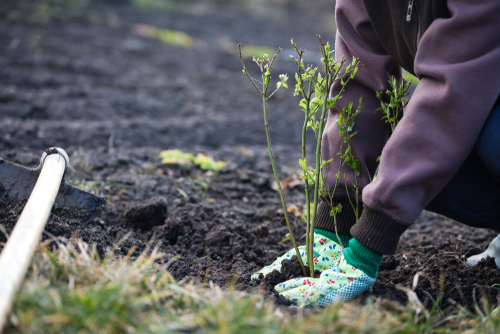
How to Plant
- Use a hand trowel to dig a hole large enough for the root ball.
- If you have some finished compost, toss a handful into the hole.
- Carefully remove the plant from its pot by turning it over into your hand and giving the bottom a gentle tap.
- Set the plant in the hole and cover the root ball completely with soil.
- Space your plants at least three feet apart.
- Press the soil down firmly and give them a good soak.
- Since slugs think young pumpkin plants are a five-star meal, it’s a good idea to sprinkle some organic slug bait around them.
If you started your seeds in peat pots, you can plant the whole thing! The roots will grow right through the sides, and the pot will eventually break down in the soil.
Caring for Your Plants
With a little TLC, your Hokkaido will take off in no time.
Watering
Pumpkins are thirsty! When the plants are small, water evaporates quickly from the soil surface, so you’ll need to water the bed generously. As the vines grow and the leaves start to shade the ground, you can back off a little since the soil will stay moist longer.
Weeding
You’ll only need to worry about hoeing and weeding early on. Once those big pumpkin leaves take over, they’ll naturally crowd out any competition.
Fertilizing
About six to eight weeks after planting, it’s time for a second feeding. You can use manure pellets again—just scatter a handful around the base and gently work it into the soil. Bone meal or a standard garden fertilizer works great too.
Liquid Fertilizer (Plant Tea)
Another cool option is making your own “plant tea.” It’s a cheap and easy alternative to store-bought stuff. Stinging nettles are perfect for this because they’re loaded with nitrogen.
Roughly chop some nettle stalks and fill a bucket (don’t pack it too tight). Fill the rest with water.
Let the mixture ferment for one to two weeks, giving it a stir every day. Fair warning: it’s going to get pretty smelly during the fermentation process, so tuck it away in a far corner of the yard!
After two weeks, the smell will mellow out, and it’s ready to use. Mix one part “tea” with ten parts water and pour it around the roots. You can do this every three to four weeks.
Pro Tip: When you first set out your plants, bury an empty clay or plastic pot right next to the Hokkaido. Pour your water into the pot instead of on the ground. This ensures the water goes straight to the roots where it’s needed most, rather than running off the surface.
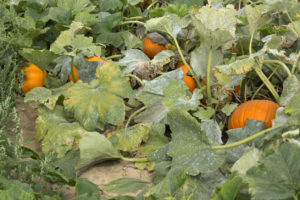
The Harvest
Hokkaido pumpkins are usually ready to harvest in the fall. Look for a deep orange or red color. The real giveaway is the stem: it will turn from green to a woody yellow or brown. That’s how you know it’s fully ripe.
If it’s been a particularly warm summer, you might see the first fruits ready by late August. However, if you want them to keep for a long time in storage, wait until mid-September or even October to start harvesting.