Hokkaido pumpkins (also known as Red Kuri squash) are a total kitchen staple. If you’re dreaming of harvesting these beauties from your own backyard, starting them from seed is the way to go! To make sure your garden is a success, I’ve put together some of my favorite tips and a step-by-step guide to get you started.
The Perfect Spot
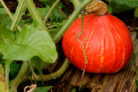
Not only are Hokkaidos delicious, but those bright orange fruits look gorgeous in the garden. Just a heads-up: these plants are heavy feeders and love to roam! You’ll want to give them their own dedicated sunny spot in the garden. Before planting, make sure to prep the soil with plenty of nutrients. Well-rotted manure is the gold standard here, but high-quality compost or organic fertilizer works great too.
Getting Your Seeds
You can easily find seeds at your local garden center or online. If you already have a perfectly ripe pumpkin in the fall, you can even save the seeds yourself! Just clean them and let them dry thoroughly, and you’ll be all set for next spring.
A Quick Variety Guide
While the classic orange Hokkaido is the most famous, there are actually a few different types to choose from. Popular red varieties include ‘Red Kuri’ or ‘Solor.’ If you want something unique, look for ‘Blue Kuri,’ which has a cool blue-grey skin. Most of these varieties will grow to be a perfect family-sized meal, weighing in between two and four pounds.
The Best Soil for Starting Seeds
When starting seeds indoors, I recommend using a specific seed-starting mix. It’s light, airy, and designed specifically for tiny seedlings. If you prefer using your own compost, go for it! Just a pro-tip: to avoid unwanted weeds popping up, you can “pasteurize” your compost by spreading it on a baking sheet and heating it in the oven at 200°F (about 100°C) for 10 minutes. This kills off any rogue weed seeds.
How to Sow Your Seeds
1. Start your seeds indoors around mid-April.
2. Fill a 4-to-6-inch pot with your starting mix.
3. Press 1 or 2 seeds about an inch (2cm) deep into the soil.
4. Firm the soil down gently.
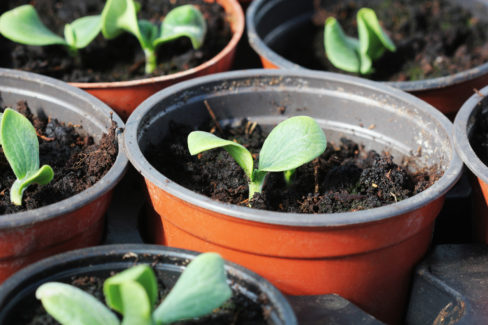
5. Water them well and place the pot on a saucer in a bright, warm spot.
6. If both seeds sprout, use a pair of scissors or a knife to snip away the smaller, weaker seedling so the stronger one can thrive.
Quick Tip: To create a mini-greenhouse effect, stretch some plastic wrap over the top of the pot until the sprout emerges. This keeps the moisture in and the temperature nice and toasty.
If you’d rather sow directly into the garden, wait until May. You want to be absolutely sure the danger of frost has passed (usually after the “Ice Saints” in mid-May). Plant the seeds about an inch deep, and remember to give them plenty of elbow room! These vines love to climb and crawl, so plan for about 20 to 30 square feet of space per plant.
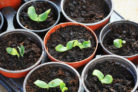
Caring for Your Seedlings
Until it’s time for transplanting in mid-May, your little seedlings need consistent moisture and lots of light. Be careful not to overwater—soggy soil can lead to root rot. If you notice your plants leaning toward the window, just give the pots a little turn every day or two to keep the stems growing straight and strong.