Creative DIYers have officially taken over the world of home decor, and now they’re moving into the garden! Using wooden pallets as herb planters has become a massive trend for backyards and balconies alike. Once you get the hang of the basic structure, you can toss the cookie-cutter manuals aside and design a custom herb garden that fits your space perfectly.
Choosing the Right Pallets
Most people stick with a standard shipping pallet (or several, if you’re going big). While you can use different types, the golden rule is to try and find ones that are as new as possible. Since pallets travel the world, they often come into contact with all sorts of substances. To be safe, you want to avoid any wood that might be contaminated with chemicals. Of course, you can always give them a good scrub, sand them down, and seal them with a protective, non-toxic finish.
Why Use Pallets?
Stone herb spirals are beautiful, and hollow concrete planters have their perks, too. But the humble pallet brings some serious benefits to the table:
- Standardized sizes make planning easy
- Built-in “pockets” are ready to be converted into planters
- Super sturdy and durable
- Easy to move around
- Budget-friendly (often even free!)
- Totally customizable: you can pull slats off, add new ones, screw them together, or paint them any color you like.
Design Ideas
Your pallet herb garden can take many shapes. You can stand it upright to create a “living wall”—a total lifesaver for small balcony gardens. You can also lay it flat on the ground or lean two pallets together like a tent to plant on both sides (this is great because you get a sunny side and a shady side!). Finally, you can take them apart and screw them back together to build a back-friendly raised garden bed.
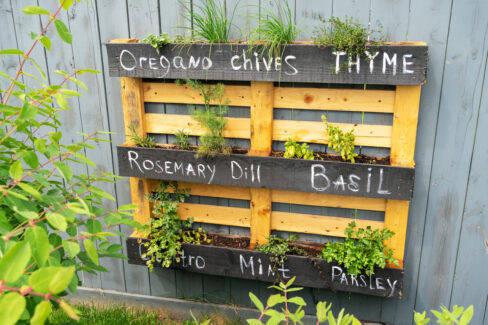
How to Build a Vertical Pallet Planter
- Stand the pallet upright on its long edge. You can lean it slightly against a wall or screw it directly into a fence or wall for stability.
- Use the side with fewer slats (the bottom) as your front. Make sure the pallet is positioned so the slats run horizontally.
- Create “floors” for your planter pockets by nailing boards across the bottom of the wooden blocks.
- Line these pockets with landscape fabric or use pre-made plastic liners designed for pallets.
- Fill your new pockets with soil. Depending on what you’re growing, use nutrient-rich compost or a sandy herb mix for Mediterranean plants.
- Pop in some perennial herb plants or sow seeds for annuals in your six new planting rows.
Pro Tip:
If you screw heavy-duty casters onto the bottom, you’ve got a mobile herb wall! You can chase the sun or roll it into the shade whenever you want.
Quick Guide for Horizontal and Raised Beds
Building a horizontal pallet bed follows the same logic as the vertical version. You’ll just need to close off the open sides and the bottom with extra slats to create contained planting sections. Line them with fabric, fill with dirt, and you’re good to go. You can often harvest the extra wood you need right from the pallet itself—just take from areas that don’t affect the overall stability.
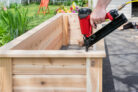
If you’re feeling extra handy, screw four pallets together to make a large box. This gives you a massive center area for planting, plus you can still use the exterior walls for smaller herbs just like the vertical wall method!