Fall is planting season, and for most bulb lovers, that means one thing: tulip time! As soon as the temperatures start to dip, you can get those spring bloomers into the ground right up until the first hard frost (which, depending on where you live, could be as late as December). If you want a stunning display come spring, there are a few “golden rules” to keep in mind.
Timing is Everything
You’ll start seeing tulip bulbs hitting the shelves at garden centers as early as September. It’s tempting to grab a few bags and head straight for the garden, but hold your horses! It’s actually way too early to plant. In September, the soil can still be around 70°F, and daytime temps are often still clinging to those late-summer highs. If you plant now, the bulbs might sprout too quickly, only to have those tender young shoots freeze once the real winter chill hits in November.
That said, go ahead and buy your bulbs in September while the selection is good! Just make sure you store them properly until planting day. Keep them in a cool, airy, and dry spot—like a chilly basement or a shaded garden shed—where they can hang out undisturbed.
Tulips actually need a “cold snap” (vernalization) to trigger their growth in the spring. Once soil temperatures drop below 50°F—usually around late October—you’ve hit the sweet spot. The ground has the right amount of moisture, and you’re usually safe from deep freezes for a while. Depending on the weather, you can often keep planting well into December. Just pick a crisp, overcast day, grab your gear, and get to work!
Location, Location, Location
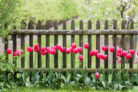
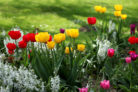
Before you start digging, you’ll want to scout out the perfect spot. Tulips love a warm, full-sun position in your flower beds. Since they’re originally from steppe regions, they prefer relatively dry soil. If your garden tends to hold water (nobody likes soggy feet!), you’ll need to add some drainage, like coarse gravel or crushed terracotta, at the bottom of the planting hole. Drainage is a absolute must if you’re growing tulips in large pots or containers on your patio or balcony. Pro tip: Plant taller tulip varieties among mid-sized perennials; the other plants act as a natural windbreak to keep those long stems from snapping.
Wild tulips and certain botanical varieties have slightly different needs, especially if you want them to naturalize and come back year after year. These guys love rock gardens or open, meadow-like spaces where they can stay put for several seasons. They also look great tucked under deciduous trees. Planting wild tulips is a breeze with a bulb planter—just pop a hole, toss in a little horn meal mixed with soil, drop the bulb in, cover, and water. After that, they’re pretty much “set it and forget it.”
How to Plant Large Tulip Varieties
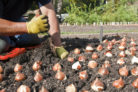
For those big, showy tulips, you’ll want to give them plenty of room. Here’s my step-by-step guide:
- Pick your ideal sunny spot.
- Loosen the soil well so it’s nice and crumbly.
- Dig your planting hole.
- Rule of thumb: The hole should be three times as deep as the bulb is tall.
- If your soil is heavy clay, add some drainage (like gravel) to the bottom.
- Dealing with voles or gophers? Place a wire bulb basket in the hole first to protect your “garden gold.”
- Add a little layer of soil back in.
- Give them a head start by mixing a handful of horn meal (or bulb fertilizer) into the soil.
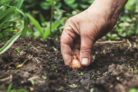
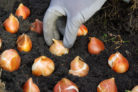
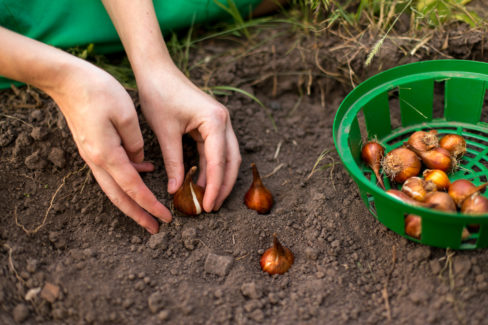
- Place the bulbs in the hole. Pointy side up! If you plant them upside down, they’ll waste all their energy trying to find the surface.
- Mix your excavated soil with some compost or a bit more horn meal.
- Fill the hole back up.
- Press the soil down firmly and give them a good drink of water.
- Blogger Tip: Stick a little marker in the ground so you don’t accidentally dig them up or plant something else on top of them later!
Growing in Pots and Containers
You can easily grow tulips in pots, tubs, or window boxes. Just make sure the containers are deep enough for the roots to spread out and provide stability. Since window boxes are usually shallower, stick with short-stemmed varieties—they handle the wind much better.
Keep in mind that container plants are more sensitive to freezing. If a deep freeze is coming, protect your pots by placing them on an insulated surface (like a wooden board or Styrofoam) and wrapping the pots in burlap or garden fleece. Whatever you do, don’t bring them into a warm house! They need that winter chill to produce those gorgeous blooms in the spring.