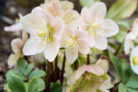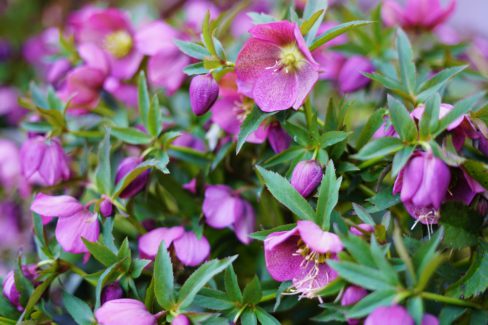
Christmas Roses (also known as Hellebores) are such a treat in the dead of winter. When everything else in the garden looks a bit gray and dreary, these delicate, white bowl-shaped flowers pop up to save the day! Since they’re such a highlight of the season, it’s only natural to want more of them scattered around your yard.
Propagating Your Christmas Roses
Just like with most perennials, you’ve got a few options here: you can start them from seed, let them self-sow, or divide them. If you’re looking for the fastest results, division is definitely the way to go. It gives you two sturdy, identical plants right off the bat.
Propagation by Division
Once your large Hellebores have finished blooming, you can divide them. Here’s how to do it without stressing the plant too much:
- Use a garden fork to loosen the soil all the way around the plant.
- Gently rock the fork back and forth to loosen those deep roots.
- Carefully lift the plant out of the ground, trying your best not to snap off too many roots.
- Use a sharp spade to split the plant in two. Make sure both halves have plenty of leaves and a healthy root system.
- Pop one half back into the original hole.
- Plant the second half in a new, pre-dug hole.
- Fill in the holes with soil, press down lightly to get rid of air pockets, and give them a good drink of water.
Propagation by Seed
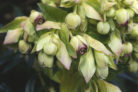
If you want to collect your own seeds, let a few of the seed pods ripen on the plant and then shake the seeds out. A quick heads-up: wear gloves! Hellebores are actually toxic in all their parts, especially the seeds and roots. You’ll want to make sure kids and pets stay away from them, too.
Once you’ve gathered your seeds, you can sow them directly where you want them to grow. These seeds are a bit picky—they actually need a period of warmth first to break their dormancy, followed by a cold snap. Since they are “cold germinators,” those little sprouts actually prefer chilly weather to get started.
If you’d rather start them in pots, just sow the seeds and leave the pots out on your balcony or patio. This lets them experience the natural temperature swings they need to sprout at the right time. Once the seedlings have grown their first two “true” leaves, they’re ready for their forever home. Pro tip: transplant them with their original soil attached so they don’t get “substrate shock”—it helps them settle in much faster!
Propagation by Self-Sowing
This is the “lazy gardener” method, and honestly, it’s the easiest! Simply skip the pruning after the flowers fade and let the seed pods ripen naturally. Eventually, they’ll burst open and scatter seeds all on their own. Local birds are usually happy to help spread them around your garden for you, too!