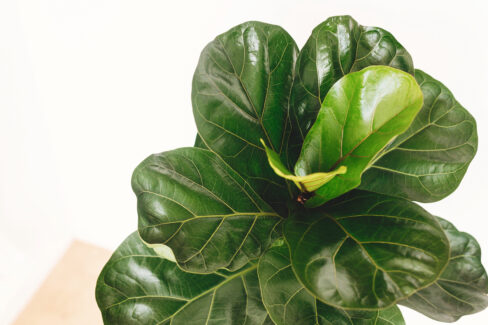
Most of us usually grab a Fiddle Leaf Fig “ready to go” from the local nursery or flower shop. But here’s a little secret: anyone—and I mean *anyone*—can easily propagate this plant at home. Sure, it takes a little patience before your baby cutting grows into a towering statement piece, but as the saying goes, good things come to those who wait. And trust me, the result is so worth it!
Three Ways to Grow Your Fiddle Leaf Family
Depending on what you’re working with, you’ve got a few options. Ideally, you’ll want to start this project in the spring when the plant is in its prime growing phase. Here are the three methods that work like a charm:
- Rooting a tip cutting
- Air layering a branch
- Growing from seed
If you already have a plant at home, you can easily take cuttings or try air layering. However, don’t expect to find seeds on your indoor tree—Ficus lyrata rarely flowers or produces seeds as a houseplant. If you want to go the seed route, you’ll need to pick some up from a reputable supplier.
How to Root Tip Cuttings
For this method, you’re looking for young, soft new growth, which is usually easiest to find on younger plants. Just a heads-up: make sure your mother plant is bushy enough so that taking a cutting doesn’t leave it looking a bit “naked” or lopsided!
- Cut a tip cutting about 6 inches long.
- Dip the cut end briefly in warm water, then let it air dry.
- Plant it in a high-quality seed-starting mix and cover it with a plastic bag or dome to keep the humidity up.
- Keep it in a bright, warm spot (around 75-85°F).
- Keep the soil consistently moist, but not soggy.
Pro Tip:
You’ll know you have a soft, non-woody stem if a milky white sap starts oozing from the cut. Dipping it in warm water helps stop that “bleeding” right away.
Mastering the Air Layering Technique
If you have an older, taller Fiddle Leaf Fig that’s gone completely woody, tip cuttings might not work. That’s where air layering comes in!
- Pick a long, sturdy, slightly woody branch.
- Make a small upward diagonal cut about halfway through the stem.
- Gently bend the stem just enough so the cut stays slightly open.
- Slip a tiny pebble or toothpick into the gap to keep it from sealing back up.
- Wrap the area in damp sphagnum moss, then wrap that in plastic wrap to lock in the moisture.
- In about 4 to 6 weeks, you should see roots forming! Once they look established, you can snip the new plant off the mother tree and pot it up.
Bonus Tip: You can actually plant the new cutting in the same pot as the mother plant. This is a great trick if your original tree has lost its lower leaves and is looking a bit “leggy” at the bottom. It fills things out beautifully!
Growing from Seed
If you’re starting from scratch with seeds, spread them out in a seed tray filled with starter mix. Don’t crowd them! Cover them with just a very thin layer of soil. Keep the tray in a warm spot and make sure the soil never dries out. Once the seedlings are strong enough, you can “prick” them out and move them into their own individual pots.
Pro Tip:
To get that classic bushy look, pinch off the growing tips of your young plants early on. This encourages them to branch out rather than just growing in one long stick.