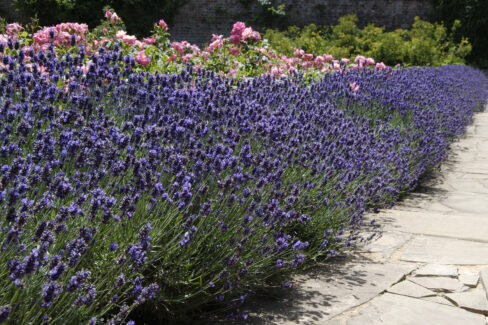
With its stunning purple blooms and heavenly scent, lavender is a total rockstar in the garden—and the best part? It’s incredibly low-maintenance. If you’ve fallen in love with your plants and want more of them, you’re in luck! There are a few different ways to propagate lavender yourself. Here’s everything you need to know to grow your lavender collection like a pro.
These are your main options:
- Propagation via cuttings
- Growing lavender from seed
- Dividing existing plants
How to Propagate Lavender from Cuttings
You don’t have to go through the hassle of starting from scratch with seeds. If you already have a lavender plant in your yard, cuttings are the way to go. In fact, you can just save the trimmings from your spring pruning session—it’s basically free plants with zero extra work! Just make sure you use a sharp, clean knife or garden shears to get a nice clean cut.
To get your lavender cuttings started, look for healthy shoots about 6 inches long. Snip them off and strip the leaves from the bottom half of the stem. Next, prep a pot with the right soil. Lavender isn’t a fan of “rich” potting mix; instead, use a lean, well-draining mixture of potting soil and sand.
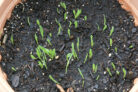
Tuck the bare bottom half of the cuttings into the soil, give them a good drink, and place them in a warm spot. You’ll want to keep the soil consistently moist, but be careful not to overwater—lavender hates “wet feet” (soggy roots). After a few weeks, those little stems will develop their own roots. Once they feel sturdy, you can transplant your new babies into their own individual pots.
Growing Lavender from Seed
You can also try growing lavender from seed, but fair warning: this method requires a bit of patience. Also, store-bought seeds aren’t always “true to type,” meaning you might end up with a mix of different varieties from a single packet. If you’re up for the challenge, here are a few tips to get those seeds sprouting.
Lavender seeds are “light germinators,” which means they need sunlight to wake up. Don’t bury them deep; just barely cover them with a thin dusting of soil. Use a low-nutrient seed-starting mix, as lavender thrives in leaner conditions. Keep the soil damp but never soaked, and place the tray in a bright, sunny spot. Once the seedlings have grown a few sets of leaves, move them into their own pots. Wait until they are strong and the danger of frost has passed before moving them out into the garden.
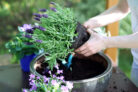
Dividing Your Lavender
Another option is dividing your lavender. If your plants are in the perfect spot and happy, they tend to spread out quite a bit. To divide them, wait until the spring (after the last frost) or early autumn. Carefully dig up the plant, being mindful of the root system, and gently split the root ball in half.
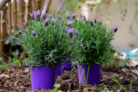
Replant your new sections about 12 inches apart in a sunny spot with well-draining, sandy soil—lavender even loves gravel beds! Just a heads-up: if your lavender is very old and “woody,” division can be a bit hit-or-miss. Sometimes older plants struggle to establish new roots after being split.
In my experience, taking cuttings is usually the most reliable way to get new plants. You can even take cuttings from your younger plants to keep the cycle going. Happy planting!