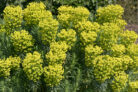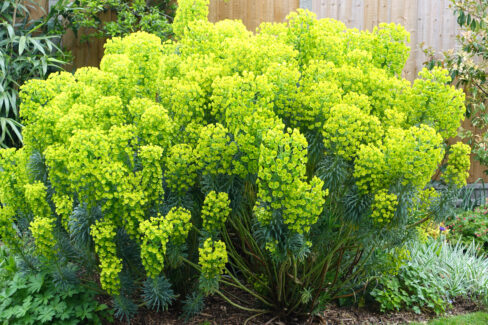
Originally hailing from Turkey, the Donkey Tail Spurge is a stunning succulent that brightens up any garden or patio container with its lovely yellow blooms from May to June. If you’ve already got one of these beauties, I have great news: it’s incredibly easy to grow your own “babies” at home. There are actually a few different ways to propagate them without much fuss!
Three Ways to Grow More Spurge
If you’re looking to multiply your *Euphorbia myrsinites* (that’s the fancy botanical name), you’ve got three main options:
- Starting from seed
- Rooting stem cuttings
- Dividing the plant
A Quick Safety Note:
Before we dive into the “how-to,” we need to talk safety. Like other members of the Euphorbia family, this plant contains a milky sap that is toxic. If it gets on your skin or in your eyes, it can cause nasty irritations or even chemical burns. Always wear sturdy gardening gloves and long sleeves when handling it. If you want to be extra careful, pop on some safety glasses to protect yourself from any accidental splashes!
Starting from Seed
The easiest way to get new plants is to let nature do the work. If your Donkey Tail Spurge is happy in its spot, it will often self-seed. You’ll start seeing tiny seedlings popping up right next to the “mama” plant. Once they’ve grown a bit and look sturdy, you can carefully transplant them to a new home. If you end up with more than you need, they’re easy to pull up—feel free to gift them to a fellow plant lover!
Rooting Stem Cuttings
Spring is the perfect time to try your hand at cuttings. For the best results, look for stems that *don’t* have flowers on them. Here’s my step-by-step guide to getting them to root:
- Snip off a few cuttings, each about 4 inches long.
- Place the cuttings in a glass of water for a few minutes to let the milky sap “bleed” out.
- Rinse off any remaining sap under warm, running water.
- Set the cuttings in a dark, dry spot for about 5 days. Don’t panic if they start to look a little shriveled—that’s totally normal!
- Plant your cutting in a pot filled with potting soil mixed with a healthy dose of sand for drainage.
Pro Tip:
If you’re feeling confident, you can skip the pot and plant the cutting directly into your garden bed. Just make sure to keep the soil lightly moist until you’re sure the roots have taken hold.
Dividing the Plant
If you have a large, established plant, you can simply split it into two or more smaller ones. Carefully dig up the entire plant, being as gentle as possible with the root ball. You can usually pull the sections apart with your fingers, but a sharp, clean knife works too if it’s being stubborn. Once you’ve got your sections, get them back into the ground in their permanent spots right away.