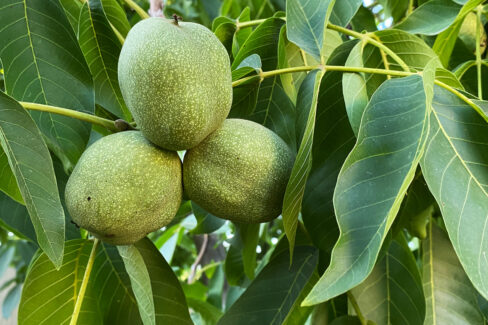
If you’re looking for a specialized way to grow a walnut tree, grafting is the way to go. I’ll be honest: it’s a bit more work than other methods and is usually left to the pros. But don’t let that intimidate you! With this guide, even a hobby gardener can successfully tackle grafting a walnut tree.
The Perks of Grafting Your Walnut Tree
While grafting a walnut tree is definitely more of a challenge than other propagation methods, the payoff is huge:
- Grafted trees are overachievers—they often produce their first harvest in just about four years.
- You’ll usually get much higher-quality nuts compared to trees grown from seed.
- A grafted tree is generally tougher and more resistant to diseases and pests.
Timing and Conditions
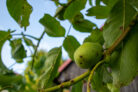
For the best results, you’ll want to use a walnut tree that is about two years old. Timing is everything here: the best window for grafting is during the winter, ideally in December.
Prepping for the Graft
Before you get to the actual grafting, you need to do a little prep work:
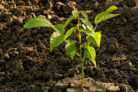
- Carefully dig up the young walnut tree, making sure to keep the root system intact.
- Prune away all the side branches and cut the main trunk down to a height of about 6 inches.
- Plant this shortened tree into a pot filled with soil. Cover it with clear plastic wrap or a bag to keep the humidity high.
- Keep the pot in a bright spot at about 68°F (20°C) and make sure the soil stays consistently moist.
- Your tree is ready for grafting once you see the first buds starting to form, which usually takes about two to four weeks.
The Grafting Process
Now, here is where the magic happens:
- Take a “scion” (a cutting from a high-quality donor tree). This should be a shoot from the previous year, about 20 inches long. Cut the end at an angle.
- Aim for a 30-degree angle, creating a cut surface about 2.5 inches long.
- Trim the rest of the scion down so the whole piece is about 4 inches long.
- Place the cut surfaces of the scion and your potted tree (the rootstock) directly against each other and secure them tightly with grafting twine or tape.
- Put the grafted tree back in its warm, bright spot and pop the plastic cover back on.
- If all goes well, you should see the first leaf shoots appearing within a few months!