In my opinion, no backyard orchard or veggie garden is truly complete without an apple tree. They aren’t just gorgeous to look at; nothing beats the flavor of a homegrown apple right off the branch. Plus, with so many different varieties out there, there’s a perfect match for every yard, no matter the size. If you’ve found a favorite tree and want to try your hand at propagating it yourself, here’s what you need to know.
The Grafted Fruit Tree
Most fruit trees are propagated “asexually” through a process called grafting. Aside from berries and a few specific plum varieties that can grow from cuttings or runners, grafting is the way to go. This involves joining your chosen variety to what we call a rootstock. Think of the rootstock as the engine of the tree—it needs to be a compatible relative. For example, an apple won’t bond long-term with a plum, pear, or cherry tree. By picking the right rootstock, you can control how big the tree grows and how well it handles your specific soil and climate conditions.
Grafting: The Classic Method
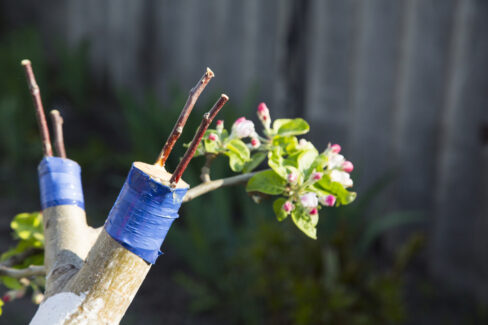
The most straightforward way to propagate is through “whip and tongue” or rind grafting. The best time to do this is in the spring just as the tree is starting to wake up and bud out. Depending on your local weather, April or May is usually the sweet spot. You’ll need a “scion”—which is just a fancy word for a short cutting from the desired tree with about five healthy buds on it. Once you’ve picked a rootstock that fits your soil type and desired tree size, you’re ready to go. With a little bit of guidance, grafting is a project any gardener can tackle.
T-Budding: The Summer Alternative
T-budding (or chip budding) is a form of summer grafting. It’s a fantastic technique for starting young plants or even adding a second “pollinator” variety to an older tree you already have. The best part about summer grafting? You can cut your buds fresh and use them immediately—no need to store them in the fridge for months. Just make sure you’re taking your buds from a mother tree that is clearly healthy and produces great fruit.
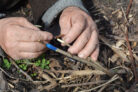
- Pick out some strong, healthy shoots, snip them off, and wrap them in a damp cloth to keep them fresh while you work.
- Strip the leaves off your cutting, but leave the little leaf stems (petioles) attached. You’ll need to slice out a “bud” along with a small sliver of bark.
- Carefully peel that bud (with its little handle and bark) away from the wood using your knife.
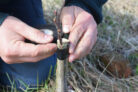
- Next, make a T-shaped slit in the bark of your rootstock where the sap is flowing well.
- Gently peel back the flaps of the “T.”
- Slide the bud down behind the bark flaps, using the leaf stem as a handle so you don’t contaminate the cut.
- Make sure the bud is tucked in deep and snug before trimming off any excess bark from the bud piece.
- Press the bark flaps down firmly and wrap the whole thing with grafting tape or rubber bands. Just make sure the actual bud stays exposed so it can breathe and grow!
Quick Tip: Always use a specialized, razor-sharp budding knife for the cleanest cuts. Happy growing!