When it comes to where it grows, garden cress isn’t exactly picky. You can actually skip the soil entirely—from seed to harvest—and just use a few layers of paper towels instead. But while soil is optional, water is non-negotiable. The big question is: how much is just right, and how much is too much?
The First Soak: Getting Started Before You Sow
You can definitely sprinkle cress seeds straight from the packet onto your growing surface, but a quick pre-soak offers two great perks. First, soaked seeds germinate much more evenly. Second, those pesky brown seed coats will slide right off the leaves on their own later. That means you won’t be picking them out of your salad or picking them off by hand! Your seeds are ready to go as soon as a clear, jelly-like layer forms around each one, which usually takes about 3 to 4 hours.
Keeping Things Moist During Germination
Once you’ve finished sowing your seeds, they need to stay consistently moist throughout the entire germination process. If it’s a warm day and you’re just using paper towels, they can dry out in a heartbeat. However, don’t try to get ahead of the game by drowning them in water—too much standing water is an open invitation for mold to grow. If you see extra water pooling, carefully pour it off. Luckily, you only have to be this meticulous for a few days. On a sunny windowsill, cress is usually ready to eat in about four days. If you grow it outdoors, it can stick around much longer, reaching up to 20 inches tall if you let it go all the way to bloom.
Pro Tip:
To keep your growing medium from drying out too fast and to prevent those delicate green sprouts from scorching, avoid placing your cress in intense, direct sunlight—like a south-facing window right against the glass.
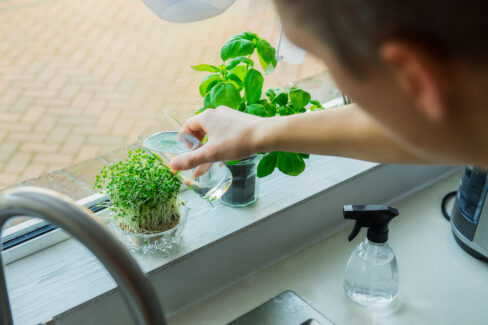
How to Water Cress: A Few Golden Rules
Keeping cress from drying out without letting it sit in a puddle is the main goal, but *how* you apply the water matters just as much as how much you use. These seeds and sprouts are so tiny and fragile that a heavy stream of water can wash them away or snap them. Until you’re ready for harvesting, keep these tips in mind:
- Press the seeds down lightly after sowing so they stay put.
- Don’t cover them with soil; they need light to germinate.
- Always use fresh water (avoid water that’s been sitting out too long).
- Use a spray bottle to mist the growing surface.
- Use a very fine mist or a gentle trickle.
- Never hold the tray directly under a running faucet.
- Skip the heavy watering cans or garden hoses.
- Be gentle even after they’ve sprouted; a strong stream can flatten them.
If you’re growing on a windowsill, you can tilt the tray slightly to make sure water doesn’t pool in one spot. In the garden, a heavy rainstorm might undo some of your hard work, but that’s just part of the adventure of outdoor gardening!