Cress is a total powerhouse—it’s packed with vitamins and has that perfect peppery kick! The best part? You don’t need a massive backyard to grow it. Whether you have a garden, a balcony, or just a sunny kitchen windowsill, you can enjoy this fresh herb year-round. It’s incredibly versatile and fits into just about any living situation. Let’s dive into how you can get started.
Finding the Perfect Spot for Your Cress
Cress is one of the least demanding guests in your garden. Honestly, you can tuck it into almost any empty nook or cranny. It’s happiest in full sun or partial shade, but it’ll even grow in the shade (it just takes a little longer to reach the finish line). It’s a fantastic catch crop or “marker crop” to show you where your slower seeds are planted. One quick tip: it’s not a fan of growing next to arugula, but otherwise, it plays well with almost all other plants.
If you’re growing it indoors, cress loves warmth and a bright windowsill. On a balcony, it’ll thrive perfectly in a simple pot.
Soil is Optional (Really!)
In your garden beds, soil is a must, but luckily cress isn’t picky. Standard garden soil works great as long as it stays consistently moist without getting waterlogged. Don’t worry too much about nutrients; cress is happy in both rich and sandy soils.
Indoors, soil can sometimes get moldy too quickly. To avoid the mess, I recommend growing cress on paper towels, tissues, or cotton pads. If you really want to use soil indoors, try sterilizing it in the oven first to kill off mold spores. For containers, anything flat works: a plate, an old plastic container, or even an egg carton. Just make sure to give any reused pots a good scrub first!
Stocking Up on Seeds
You can find cress seeds for cheap at any garden center. If those tiny packets aren’t enough for your needs, you can easily buy bulk bags online. In the garden, you can even let a few plants go to flower so you can harvest your own seeds for propagation. Just a heads-up: indoor cress won’t flower because we usually eat it too soon, and there aren’t any bees inside to help with pollination anyway!
When to Start Planting
Indoors, you can sow cress all year long! During the darker winter months, it might take a day or two longer to grow, but it’s still totally worth it. Winter is actually my favorite time to grow cress because while the garden is dormant, it’s the easiest way to get a hit of fresh, homegrown greens. Just make sure it gets enough light; if it’s too dark, the sprouts will get “leggy” (tall and weak) instead of strong and crunchy.
For outdoor planting, keep these tips in mind:
- Cress is sensitive to frost and loves soil temperatures above 60°F (15°C).
- In warmer areas, you can start sowing outdoors in March.
- Otherwise, May through September (sometimes even October) is the sweet spot.
- You can keep sowing new batches anytime within this window!
Tips for Sowing Success
Sowing cress is easy, but there are a few “golden rules” to make sure they sprout reliably:
- Loosen the soil well (mix in some sand if it’s heavy).
- Sow the seeds in rows or scatter them across a wide area.
- Pro tip: Mix the seeds with a little sand before sowing to help spread them evenly.
- Keep rows about 6 inches (15 cm) apart.
- If you’re growing watercress, sow it a bit thinner.
- Don’t cover the seeds with soil! Cress needs light to germinate.
- Press the seeds gently into the surface so they don’t wash away in the rain.
- Don’t worry about birds; they usually find the spicy seeds unappetizing.
- Water immediately and gently (a mist is best) so you don’t displace the seeds.
- Never let the soil dry out completely.
- No need to thin them out (prick out)—just harvest the ones that are growing too close together.
Keep the Harvest Coming
Indoors, cress is ready to eat in just a few days. Once you harvest it, it won’t regrow because the growth point is right under the leaves and gets removed when you snip it. That’s also where all the flavor is, so don’t bother trying to pluck individual leaves—just snip and enjoy! Cress is best eaten fresh; it doesn’t store well, and drying or freezing it ruins the flavor.
To keep a steady supply, sow new seeds every few days. In the garden, it takes 2-3 weeks to mature. You can harvest it until it starts to flower, at which point the taste becomes a bit too intense.
Quick Tip: Want to know if your garden compost is ready? Do the “Cress Test.” If cress seeds sprout in a sample of your compost within a few days and stay green, your compost is “ripe” and ready to use. If the seedlings are yellow or stunted, the compost needs more time to break down.
Caring for Your Cress
After sowing, your only job is to keep things moist. I highly recommend using a spray bottle for watering. A heavy stream from a watering can can wash away seeds or flatten the delicate sprouts. No fertilizer is needed!
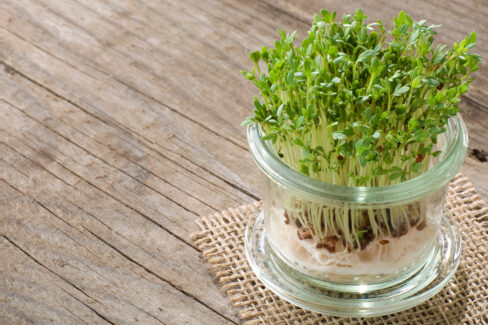
Growing Sprouts in a Jar
Since cress seeds germinate so fast, you can also use a sprouting jar. This method allows you to grow cress sprouts using nothing but water and a little humidity—no soil or paper towels required!