Banana plants are incredibly vigorous growers! Since the main trunk naturally dies back after flowering, the plant has a clever survival strategy: it constantly sends out new shoots, known as “pups.” Before you know it, you’ve got a whole little banana family on your hands. If you’re looking to pot up those pups and expand your collection, here are some pro tips to get you started.
A Little Botany Lesson
A banana plant is essentially a self-regenerating machine. After about 2 to 5 years, a banana tree will bloom . Once it produces fruit, the main stalk dies off—or, as they do on large plantations, it gets cut back.
To ensure the plant’s legacy lives on, it pushes out those new offsets (the pups). Just keep in mind that even after the flowers appear, it can take up to a year for the fruit to actually ripen on the stem.
While bananas thrive in the tropical and subtropical regions of Asia where conditions are perfect, getting a harvest in cooler climates is a bit of a rarity. You’ll often hear them called “banana trees,” but that’s a bit of a misnomer. That thick “trunk” is actually a pseudostem made up of tightly packed leaf bases, not wood!
Separating the Pups
Your banana plant is going to keep busy producing new shoots, which means things can get crowded in a container pretty fast. Repotting every two years is the perfect time to separate these pups from the mother plant.
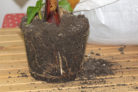
Start by carefully sliding the plant out of its pot. If a lot of pups have crowded in there, this can be a bit of a struggle—in the worst-case scenario, you might even have to carefully cut the pot away.
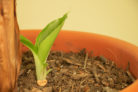
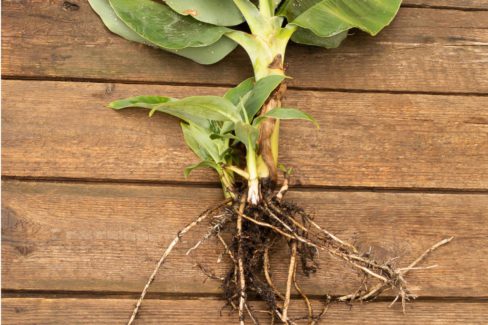
Once it’s out, shake off as much soil as possible from the roots. Use a sharp, clean knife to slice the pup away from the main plant. A clean cut heals much faster than a jagged one. Make sure the pup you’re removing already has its own leaves and, most importantly, its own root system. Without roots, the little guy will have a hard time established.
If you see tiny shoots that aren’t quite ready yet, leave them be! You can repot them along with a larger plant and wait until they’re big enough to strike out on their own later.
Potting Up Your New Plants
Grab a decent-sized pot and fill it with some high-quality potting soil . If you’re using home-made compost, it’s a good idea to “steam” it first to kill off any hitchhiking pests or bacteria. Just spread the soil on a baking sheet and pop it in the oven at 200°F (about 100°C) for 10 minutes.
To give your new plant the best start, dab a little wood ash on the cut surface of the pup to disinfect it. This helps prevent rot and keeps bacteria at bay.
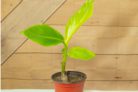
Place the pup in the pot and check the depth—it should sit at the same level in the soil as it did before. Fill in the rest with soil and give it a good drink of water.
Quick Tip: To give your new plant a tropical boost, cover the pot with a clear plastic bag. This creates a mini-greenhouse effect, locking in humidity and warmth while reducing moisture loss through the leaves.