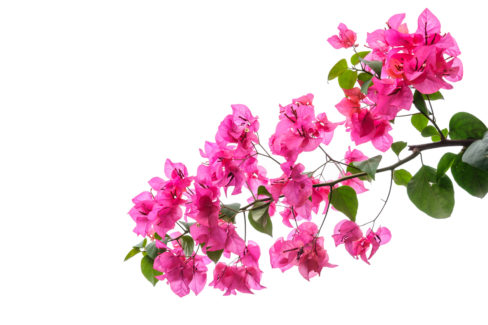
Want to bring a touch of the tropics to your home? You can actually grow your own Bougainvillea (also known as Paperflower) right from cuttings! It’s a pretty straightforward process, but I’ll be honest with you: it takes a healthy dose of patience. It’s going to take some time before that little cutting transforms into a sturdy, vibrant plant, but the payoff is totally worth it.
Taking Your Cuttings
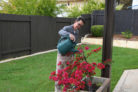
The best time to take Bougainvillea cuttings is in early spring. This gives the “tip cuttings” plenty of time to establish roots. Plus, you can kill two birds with one stone by taking cuttings while you’re already doing your spring garden chores, like:
- Repotting
- Pruning
For the best results, look for mature shoots that haven’t turned woody yet. Here’s what to do:
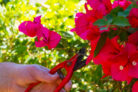
- Cut a piece about 8 to 12 inches long.
- Strip off the lower leaves so the bottom of the stem is bare.
Planting the Cuttings
Once your cuttings are ready, tuck them into small pots filled with moist seed-starting mix. If you want to give them a little head start, you can dip the cut ends into some rooting hormone first. For the next few weeks, your new babies are going to need three main things:
- Light
- Heat
- Humidity
Light
To make sure they get enough light, place them in a bright spot with indirect light. Avoid direct sun for now, as it’s a bit too harsh for these delicate cuttings.
Heat
These plants love it warm! You’re aiming for an air temperature of at least 75°F (24°C). It’s also important to keep the soil temperature around the same level. A pro tip? Place a piece of Styrofoam under the pots to help insulate them from cold surfaces.
Humidity
A mini-greenhouse is the perfect environment for cuttings—it keeps things humid and warm (especially if it’s a heated model). If you don’t have one, don’t worry! You can just pop a clear plastic bag over the pot and secure it with a rubber band to create a DIY humidity dome.
Caring for Your Cuttings
As long as they have enough light, heat, and moisture, these cuttings are actually pretty low-maintenance. Just make sure the soil stays consistently moist (but not soggy). To prevent any mold from growing, lift the plastic cover every few days to let in some fresh air and check if the soil needs a quick spritz of water.
Now comes the hard part: waiting. It will take several weeks for roots to form. You’ll know they’ve “taken” when you see new little leaves starting to sprout. Once that happens, you can move them into larger pots.
Hardening Off
Once they’re in their new pots, you can ditch the plastic bag. To make sure your cutting grows into a tough plant ready for the balcony or patio, you’ll want to:
- Gradually introduce it to direct sunlight.
- Move it to a slightly cooler spot.
- Start treating it like a “grown-up” plant with your regular care routine.