If you really want that chili heat to pack a punch, drying your harvest is the way to go. Drying concentrates the flavor and the fire, and there are a few different ways to get the job done. However, the secret to a great-tasting dried pepper actually starts before you even pick them—it’s all about the timing.
The Right Ripeness
Technically, you can harvest chilies at any stage, but for the best aroma and flavor once dried, you want them fully ripe. Because of this, it’s often a good idea to pinch off any new blossoms that show up in late summer or fall. Many of us hobby gardeners also trim back late-season shoots to make sure the plant puts all its energy into ripening the existing fruit before the first frost.
Harvesting Tips
For the most flavorful peppers, try to harvest after a nice stretch of sunny, dry weather. The best time of day is late morning, once the dew has evaporated but before the midday sun gets too intense. You can dry whole peppers or even ones that have a little physical damage, but stay away from anything with soft or rotten spots. In some drying methods, one bad pepper can cause the whole batch to rot.
To Seed or Not to Seed?
You’ve got a choice here: dry the whole pepper as-is, or dry the seeds separately. If you’re planning on planting them next year, you definitely want to remove the seeds first. For seeds intended for planting, air-drying is the only way to go. Other methods involve heat that can kill the embryo or make germination take forever.
Drying in the Oven
If you don’t have fancy equipment, your oven is a great tool. A convection oven (with a fan) is ideal, but a standard oven works too—it just takes a bit longer.
How to do it:
- Wash and thoroughly dry your chilies.
- Line a baking sheet with parchment paper.
- Spread the peppers out so they aren’t crowded.
- Set your oven to about 120°F (50°C).
- Prop the oven door open slightly to let moisture escape.
If you flip the peppers every now and then, they’ll dry faster. You can dry them whole or chop them into smaller pieces first to speed things up.
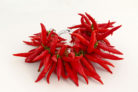
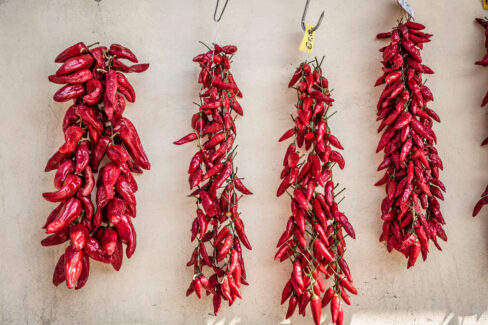
Air Drying
Air drying is the “low and slow” traditional method. A fun way to do this is to make a chili “ristra”—just use a needle and thread to string the peppers together by their stems. They look great hanging in the kitchen, and you can just pluck one off whenever you’re cooking.
If you’re not feeling crafty, you can just lay them out in a cardboard box in a dry, warm-ish spot. It takes longer than hanging them, and you’ll need to toss them around occasionally to check for any signs of mold or rot.
Using a Dehydrator
If you have a food dehydrator, use it! These are great because they allow for lower, consistent temperatures, which preserves the flavor better than an oven.
Usually, you’ll dry whole peppers in a dehydrator. If you want to dry small pieces, you can lay a piece of parchment paper on the trays so they don’t fall through the gaps. Just make sure you don’t cover the entire tray—you need air to circulate, or the machine could overheat.
Storing Your Dried Chilies
Once they’re out of the oven or dehydrator, get them into airtight containers immediately. You don’t want them soaking up moisture from the air and getting leathery. Air-dried chilies are a bit more resilient to humidity, so they can stay on their string or be kept in paper bags.
One heads-up: some chili varieties are a favorite snack for pantry moths. If you’ve had trouble with these pests before, you might want to freeze your dried chilies to keep them safe and sound.