If you’re looking to add more elderberry bushes to your yard, there’s no need to run to the nursery and spend a bunch of money on new plants. You can actually grow new ones for free using cuttings from the plants you already have! It’s a super simple process, and I’m going to walk you through it step-by-step.
Taking Elderberry Cuttings in the Summer
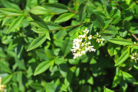
The best time to propagate elderberry is in mid-summer when the bush is at its peak vitality. You’ll want to look for “semi-ripe” cuttings—these are stems that are starting to get a little woody but are still flexible. Aim for pieces that are about 4 to 6 inches long with several leaf nodes. Here’s how to do it:
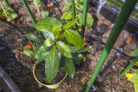
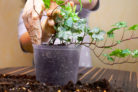
- Get some small starter pots ready with seed-starting mix or a sandy peat blend.
- Strip the leaves off the bottom half of the cutting. For the remaining leaves at the top, snip them in half to reduce moisture loss.
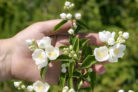
- Pinch off any flower buds or berries so the plant focuses its energy on roots.
- Stick the cuttings into the soil so that at least one leaf node is buried.
- Give them a good drink of water and pop a clear plastic bag over the pot to create a mini greenhouse.
- Place the pots in a warm, sheltered spot out of direct sunlight.
- By next spring, your new little elderberry will be ready to move into the garden!
Using Hardwood Cuttings in the Winter
If you missed the summer window, don’t worry! You can also take “hardwood cuttings” while the plant is dormant in the winter. Look for woody branches that grew this past year. Since there are no leaves, you’ll just see “sleeping” buds along the stem. Pro tip: Cut the top of the stem straight across and the bottom at an angle. This makes it way easier to remember which end goes down into the dirt!
- Snip your branches into sections about 4 to 6 inches long.
- You’ll want to bury about three-quarters of the cutting in the soil.
- Use a sandy substrate or a peat-sand mix for these.
- Make sure the angled end is the one going into the ground.
- You don’t need to water or fertilize them yet—just keep the pots in a cool, dark place.
Once you see the first little leaves starting to peek out, you can move them to a bright, warm spot and start watering them. These winter babies will be ready to be transplanted outdoors by the following autumn.