Right up there with apples, pears are a total staple in any home orchard. While growing a pear tree is pretty similar to growing an apple tree, you’ve gotta have a little patience—pears are famous for taking their sweet time before they start producing fruit. If you’re short on space, pears are also fantastic candidates for growing as espaliers (that’s just a fancy word for training them flat against a wall or fence).
Finding the Perfect Spot
Pear trees have a pretty long growing season. They start budding early in the spring, which means those delicate blossoms need protection from late frosts. Pears love to stay warm, so if you live in a cooler climate, try planting your tree against a south-facing wall to soak up that extra heat. As for the soil, they aren’t too picky, but they do hate “wet feet” and chalky ground. I definitely recommend mulching and giving them a boost with some good compost.
Pro Tip
Keep in mind that most pear trees, like apples, aren’t loners—they need a partner for cross-pollination to actually produce fruit. You’ll need a second variety nearby that blooms at the same time. There are a few exceptions, like the “Conference” pear, which can hold its own without a partner.
Dealing with Pests and Problems
A cold, frosty spring can really ruin your harvest before it even starts. If the forecast calls for a freeze, throw some horticultural fleece over your tree overnight and take it off in the morning. Another thing to watch out for is pear scab, which causes ugly black spots on the fruit. If you see it, prune away any damaged branches and make sure to burn the affected fruit and fallen leaves so it doesn’t spread. Also, keep an eye out for birds and wasps—they love pears as much as we do! A fine mesh net can help keep them at bay.
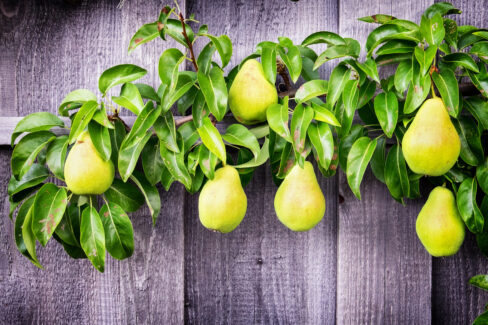
How to Get Started
- To start training your espalier, pick out three strong branches during the first year. Tie two of them down horizontally to your support wires, and let the middle one grow straight up. You can go ahead and prune away any other stray branches.
- In the second year, prune back that central leader during the winter to encourage new branching. It’s best to cut just above where you want your next set of horizontal arms to grow. Once summer hits, tie down the next two side branches.
- Just keep repeating this process every year until your tree has reached the height and number of tiers you’re looking for!