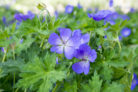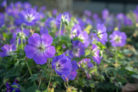
If you’re looking for a reliable, low-maintenance plant to fill in those tricky gaps in your garden, let me introduce you to the Hardy Geranium (also known as Cranesbill). This low-growing herbaceous perennial is a total rockstar—it spreads via underground rhizomes, making it one of the best groundcovers out there. The best part? It’s not picky at all. Whether you have a sunny spot or a stubborn shady corner, this plant will thrive in almost any soil.
While it spreads on its own, if you want to take charge and expand your collection, growing them from seed is a super rewarding way to go.
Collecting and Sowing Your Seeds
Growing from seed is a fantastic way to multiply your Hardy Geraniums. You can harvest seeds from your own plants, pick up specific varieties at your local nursery, or even swap seeds with fellow gardeners in online forums. It’s a great way to find unique species you won’t see in every backyard.
If you’re planning to harvest your own, timing is everything—and I’ll be honest, it can be a bit of a challenge! You can’t use green seeds, so you have to wait for them to ripen. But don’t wait too long! If you aren’t checking them regularly, you’ll walk out to find empty pods. Once the seed pods turn brown and dry, the plant literally catapults the seeds across the garden. Plus, birds love them as a snack.
Pro tip: Keep a close eye on the pods. If they pop open the second you touch them, they’re perfectly ripe and ready to go.
How to Sow Your Seeds
I recommend starting your seeds indoors in March or April rather than sowing them directly outside. A sunny windowsill or a mini-greenhouse is the perfect spot. Here’s my step-by-step guide to getting them started:
- Fill shallow seed trays with a mix of sand and potting soil.
- Sprinkle the seeds thinly across the surface and cover them with just a light dusting of soil.
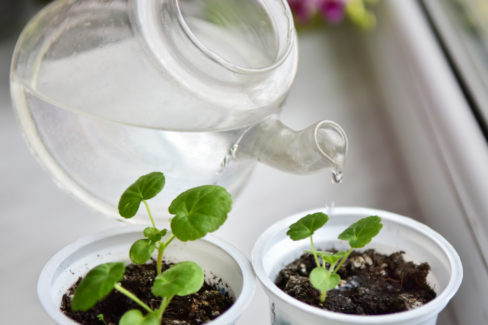
- Place the trays in a bright, warm spot.
- Keep the soil consistently moist (but not soggy!).
- To create that “tropical” humidity they love, cover the trays with plastic wrap or use a mini-greenhouse.
- Don’t forget: Lift the cover daily to let in some fresh air so you don’t end up with mold.
Patience is key here! Some seeds will sprout right away, while others take their sweet time. Once your seedlings have grown their third leaf, they’re ready to be “pricked out” (carefully moved) into their own individual pots.
Wait until mid-May—once the threat of frost has passed—to move them outside. Just keep in mind that these little guys usually won’t bloom until their second year, provided you’ve planted them in the right spot. Happy gardening!