Whether you’re after those fragrant elderflowers in late spring or the deep purple berries in the fall, timing and technique are everything. To get that perfect floral flavor, you need plenty of pollen on your blossoms. On the flip side, harvesting the berries can get a little messy if you aren’t prepared. In this post, I’ll walk you through the best ways to harvest elderberry plants like a pro.
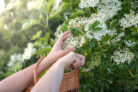
Picking Elderflowers Starting in May
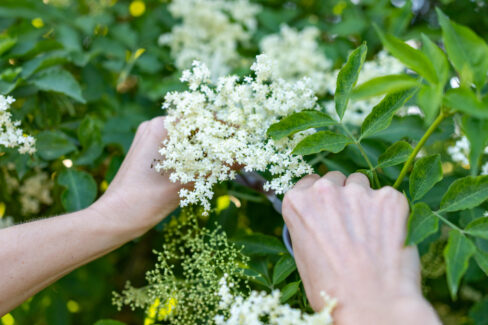
Elderflowers make the most refreshing summer syrup (perfect for a cold drink on the patio!), and they are absolutely phenomenal dipped in batter and fried up with a dusting of powdered sugar. But to get that sweet, signature taste, you have to harvest them just right. Here’s my checklist for picking elderflowers:
- Wait for a sunny day to head out.
- Make sure it hasn’t rained for at least three days prior (you want that pollen intact!).
- Use scissors to snip off the entire flower cluster (the umbel).
- Look for clusters where the tiny flowers are fully open.
- Don’t take them all! Leave enough blossoms behind so the plant can produce berries later.
- Gently place your flowers in a basket and use them right away for the best flavor.
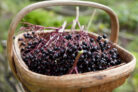
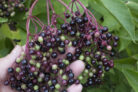
Harvesting Elderberries Starting in August
When it comes time to harvest those juicy berries, my first piece of advice is: wear old clothes! That dark red juice is no joke and will stain your favorite shirt in a heartbeat. You’ll want to bring along some scissors, a plastic bag, and maybe even some disposable gloves to keep your hands clean. Here is the best way to gather your haul:
- Look for clusters where all the berries are dark and ripe.
- Always snip off the entire cluster at the stem.
- If you see a few unripe green berries mixed in, just pluck them off with your fingers.
- Collect the clusters in a plastic bag, or better yet, a basket lined with a plastic bag to catch any drips.