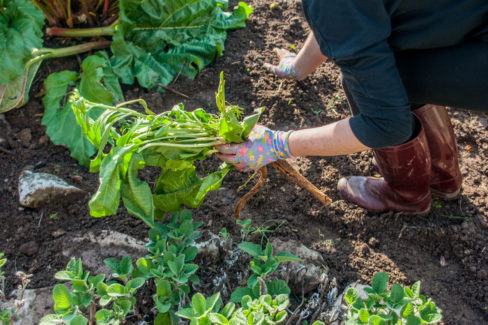
Once you’ve had a taste of fresh, homegrown horseradish, there’s no going back to the store-bought jars! The best part? It’s one of the easiest perennials to grow in your backyard because it’s incredibly simple to propagate.
Planting Starts in the Spring
Technically, you can plant horseradish year-round, but for the best results, you want a good stretch of frost-free weather. Most gardeners aim for a window between early spring and late fall.
Don’t panic if you get a surprise late frost after planting in the spring, though. Horseradish roots are tough as nails and won’t be bothered by a little chill once they’re tucked into the soil.
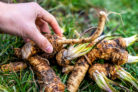
Propagating via Root Cuttings
While you *can* grow horseradish from seed, it’s a total headache and often doesn’t work out well. It’s much easier to propagate using root cuttings (often called “sets”). You can even use a healthy-looking organic horseradish root from the grocery store!
How to do it:
- Cut the root into pieces about 1 to 1.5 inches long.
- Let the cut ends dry out for a few days to callus over.
- Plant them in a mix of nutrient-rich potting soil and sand.
- Give them a light watering.
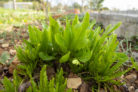
Within a few weeks, the roots will sprout, and you’ll see the first leaves popping up. Fun fact: the leaves are actually edible! They don’t have that intense “kick” the root is famous for, but they work great mixed into a salad or stir-fry in small amounts.
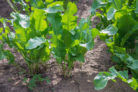
Care and Maintenance
Horseradish is about as low-maintenance as it gets. In many climates, it can survive the whole year without you ever picking up a watering can. However, if you want those thick, beautiful roots for the kitchen, a little TLC goes a long way. This plant loves nutrient-dense soil and moderate moisture. Just a heads-up: because it spreads and stays in the ground for years, it’s usually better off at the edge of a vegetable garden rather than in a small herb bed.
Since it’s a perennial, find a permanent “forever home” for it. Feed it with a liquid fertilizer once a month during the growing season. In the fall, mix some compost into the soil, and in the spring, a handful of organic nitrogen-rich fertilizer (like blood meal or horn meal) scratched into the surface will give it a great head start.
Other than occasional watering, there’s not much else to do. One pro tip: if you see flowers starting to form, snip them off right away. If the plant puts its energy into blooming, the root won’t grow as thick or flavorful!