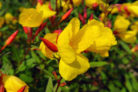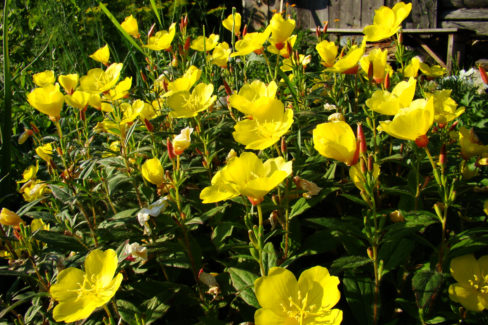
The Evening Primrose is a lovely perennial known for its upright, clumping growth habit. While there are many varieties out there, the Common Evening Primrose (*Oenothera biennis*) is the one you’ll spot most often. Before you start digging, definitely check the expected size of your specific variety—these plants can vary quite a bit in height!
Pro-Tips for Planting Your Evening Primrose
Before you head to the garden center, take a good look at your yard’s growing conditions. You’ll want to pay close attention to your soil type, moisture levels, and how much light the area gets. Spring is generally the best time to get these beauties in the ground. If you miss the spring window, don’t sweat it—you can plant them year-round as long as the ground isn’t frozen.
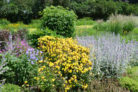
When mapping out your garden bed, give them some breathing room—about 25 inches (65cm) apart is perfect. A good rule of thumb is to aim for 2 or 3 plants per square meter. Since some varieties get pretty tall, place the big guys in the back of the border and keep the shorter ones up front.
Prepping Your Garden Bed
Before those little plants hit the dirt, you’ll want to loosen up the soil. Dig down about one or two spade-lengths deep and clear out any rocks or stubborn weeds (make sure to get the roots!).
This is also a great time to mix in some organic fertilizer or compost. If you’re dealing with heavy clay soil, mixing in some sand will help with drainage. Once you’re done, just rake the surface smooth.
The “Bucket Trick” Before Planting
Here’s a little secret for success: give your plants a good soak before they go into the ground. I like to submerge the nursery pot in a bucket of water until the air bubbles stop rising.
Once they’re hydrated, place them in the planting hole at the same depth they were in the pot. Fill in the gaps with soil, press down firmly with your fingers to get rid of air pockets, and give them another drink of water. This helps the roots settle in and get growing fast!
Growing Evening Primrose in Containers
Evening Primrose isn’t just for wild gardens or flower beds—it looks fantastic in pots on a patio, too! For container growing, I recommend mixing a high-quality potting soil with about 30% sand.
Good drainage is non-negotiable. Make sure your pot has plenty of drainage holes, and add a layer of expanded clay pebbles or bark mulch at the bottom. To keep things from getting waterlogged, place a few broken terracotta shards over the drainage holes before adding your soil.