Onions are a staple in almost every kitchen, and for good reason—they’re delicious, packed with health benefits, and surprisingly easy to grow. If you’ve been thinking about adding them to your garden, you’re in luck! Growing onions from sets (small starter bulbs) is a foolproof way to get a great harvest. Let’s dive into everything you need to know to get those onions in the ground.
Planting Onion Sets
Planting onion sets is a fantastic alternative to starting from seed. Sets usually take off quickly and almost guarantee a bountiful harvest. While seeds offer a wider variety of unique types, the sheer ease of using sets makes up for it. Varieties like “Stuttgarter Riesen” are a dream for home gardeners—even if you’re a total beginner. On the other hand, if you’re looking for a bit of a challenge, you can always try starting onions from seed indoors.
Don’t be afraid to experiment with different varieties! Just keep in mind that some onions don’t always play nice with their neighbors. You can choose from:
- Shallots for a sophisticated, savory flavor
- Robust yellow cooking onions
- Large, sweet Spanish onions
- Overwintering (winter) or spring-planted (summer) sets
Most gardeners eventually find a “go-to” favorite, but I always encourage trying something new every season. Be bold!
Timing is everything. Summer sets (the most common kind) go into the ground around late March or early April. Winter sets, however, are planted between August and October. These little guys overwinter in the soil and are ready for an early spring harvest.
Location and Soil
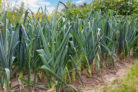
Onions aren’t particularly picky, but they do have some preferences. They love a sunny spot with a bit of a breeze—especially if you live somewhere humid, as good airflow keeps diseases at bay. One golden rule: rotate your crops! Don’t plant onions in the same spot twice in a row. You should also avoid spots where you’ve recently grown other members of the Allium family (like chives, garlic, or leeks) to keep the soil from getting depleted.
As for the soil, onions love it loose and weed-free. You don’t need to fertilize right at planting time, but digging in some organic matter (like compost) a few months in advance works wonders. If you’re planting in the spring, prep the bed with compost the previous fall. Pro tip: onions love growing next to beets and carrots!
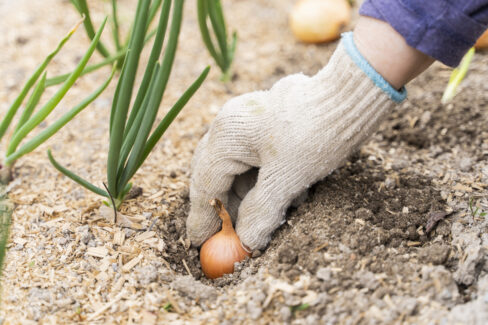
Getting Them in the Ground
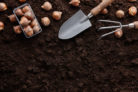
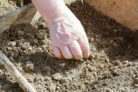
When it’s time to plant, don’t bury the bulb completely. You want the very tip of the onion to peek out just above the soil surface. While every variety is a little different, here’s a good rule of thumb: plant them about an inch deep, leaving 8 to 12 inches between rows. Space the individual onions about 2 to 4 inches apart.
If you’re using small sets (less than 15mm in diameter), they are much less likely to “bolt” (go to seed prematurely). This is especially true if they’ve been stored at warm temperatures (75-95°F) for a month before planting. If you bought your sets from a garden center, they’ve usually handled this for you already.
Tips for Winter Onions
Growing winter onions requires a slightly different approach. They still love loose soil, but you can spread a layer of compost right before planting. Avoid high-nitrogen fertilizers, though, as they can make the bulbs mushy. As mentioned, these go in during the fall. By the time winter hits, they should have started growing; only the plants that have reached about “pencil thickness” before the big freeze are likely to make it through.
Overwintering onions is usually pretty straightforward. A thick layer of snow actually acts like a warm blanket for them. If you’re having a “brown winter” with freezing temps but no snow, protect your onions with some garden fleece or brushwood. Just a heads-up: winter onions are best for fresh eating and don’t store as long as summer varieties.
Harvesting Your Onions
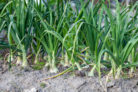
Summer onions are usually ready to pull in August, while winter onions are ready much earlier—typically in May. You’ll know it’s time when the green tops turn yellow and start to flop over. Give the bulbs plenty of time to finish this process naturally. Never bend the tops over yourself to try and speed things up; it can lead to rot and makes them spoil faster in storage.
Pick a dry day for your harvest and stop watering a few weeks beforehand. Once you’ve pulled them, let the bulbs dry out on top of the soil for a week or two (as long as the weather is dry and not scorching hot). Afterward, hang them up to finish curing. This helps the outer skins harden. Once the foliage is completely bone-dry, your onions are ready for long-term storage!