Propagating exotic houseplants can sometimes feel like a challenge. Between tricky indoor climates and the fact that many tropical beauties won’t produce seeds in a typical living room, it’s easy to get discouraged. However, I have some good news: propagating bromeliads is actually totally doable!
Is it hard to propagate bromeliads?
Propagating bromeliads is surprisingly simple—maybe even easier than you’d expect. Honestly, all you really need is a little patience. The plant actually does most of the heavy lifting itself, though it waits until it’s good and ready—usually right after it finishes blooming. If you’re feeling adventurous, you can also grow them from seeds, which you can find at specialty garden centers or online.
How do bromeliads propagate themselves?
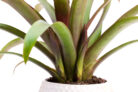
Once your bromeliad is done blooming, it starts focusing its energy on creating “pups” (also known as offshoots or kindel). To help these little guys thrive, keep giving the mother plant its usual dose of water and nutrients. A pro tip: leave the dried-up flower on the plant. If you cut it off too early, the mother plant might die back before the pups are strong enough to survive on their own.
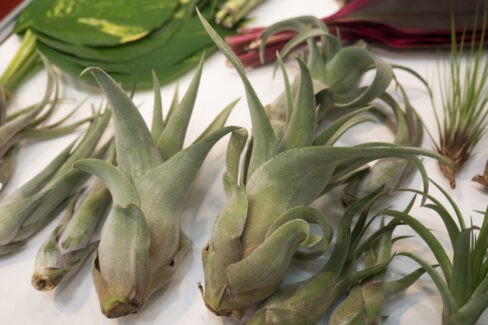
Propagating via pups:
- The bromeliad naturally produces pups after the flowering cycle.
- Keep watering and fertilizing the spent plant just like you always have.
- Don’t move it; keep it in its favorite spot.
- Wait until the pups are about half the size of the mother plant before moving them.
- Use a sharp, sterilized knife to carefully detach the offshoot.
- Let the cut end air-dry for a bit to prevent rot.
- You can mount the tiny bromeliads or pot them individually.
- Go easy on the water and fertilizer at first while they establish roots.
How do you grow bromeliads from seed?
If you’re trying the seed route, the secret is heat. You’ll need to maintain a consistent germination temperature between 73°F and 80°F (23°C to 27°C). The location for your seedlings should be just like where the adults live: bright and warm, but away from harsh, direct sunlight. Instead of watering them with a heavy stream, use a spray bottle with room-temperature water to keep things moist.
To keep the humidity and temperature steady, cover your starter pot with something transparent—a pane of glass, a clear plastic bag, or some plastic wrap works perfectly. Once they sprout, make sure to vent the cover regularly so you don’t run into any mold issues.
Step-by-step bromeliad seeding:
- Fill a starter pot with a 2:1 mix of peat (or a peat substitute) and sand.
- Spread the seeds evenly on the surface and press them down gently.
- Don’t bury them! These seeds need light to germinate.
- Mist the seeds and soil with lukewarm, soft water (low lime content).
- Cover the pot with glass or clear plastic.
- Place in a bright, warm spot out of direct sun.
- Germination usually takes about 7 to 14 days.
- Keep the temp between 73°F and 80°F.