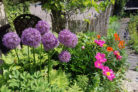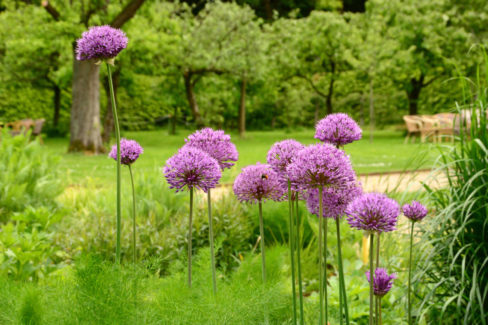
Giant Allium (botanically known as *Allium giganteum*) is a real showstopper that usually does a great job of spreading on its own in the wild. But if you want to take the reins and multiply these impressive purple globes yourself, you totally can! There are a few easy ways to get more of these beauties in your garden.
Natural Spreading via Offsets
When planted in the right spot, Giant Allium is pretty self-sufficient. It naturally multiplies by dropping its own ripe seeds and by growing “baby” bulbs (called offsets) right next to the main mother bulb. Before you know it, those little offsets sprout into brand-new plants all on their own.
Your Options for Propagation
If you want to be a bit more hands-on, you have two main methods to choose from:
- Growing them from seed
- Dividing the bulbs
Growing Allium Giganteum from Seed
You can definitely go the DIY route with seeds. Whether you buy a packet at the local nursery or harvest them from your own spent blooms is up to you. If you’re harvesting your own, wait until the seeds turn completely black—that’s how you know they’re fully ripe and ready to go.
Here’s a pro tip: Allium seeds are “cold germinators.” If you collect them yourself, they need a little “winter” simulation, so pop them in the fridge or freezer for a few days before planting. If you bought your seeds from a store, they’ve usually already been treated and are ready for soil.
You can start them in seed trays with good potting mix on a sunny windowsill, or just sow them directly into the garden where you want them to grow. Either way, keep the soil consistently moist, but make sure it’s not soaking wet—nobody likes soggy feet!
Dividing Allium Giganteum Bulbs
Another great way to get more flowers is by dividing the offsets. To do this, you’ll need to carefully dig up the entire plant and shake off the dirt so you can see what’s going on underground. The best time to do this is in the fall, just before the first frost hits.
Once you spot the little daughter bulbs attached to the main mother bulb, gently snap them off or use a sharp, clean knife to separate them. Try to be as gentle as possible to avoid damaging the bulbs or any new shoots. Ideally, each little bulb you remove should already have at least one sprout starting.
After that, just tuck your new bulbs into their new homes in the garden and keep them well-watered while they get settled in. Happy planting!