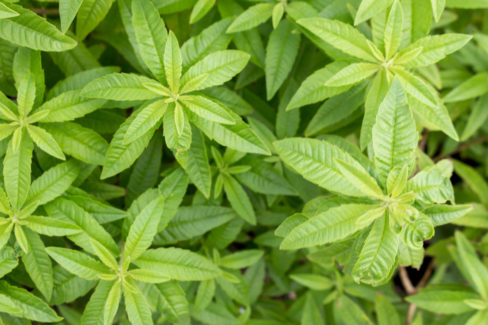
Lemon verbena is a total garden favorite, and for good reason! Not only does it smell absolutely heavenly, but it’s also a powerhouse when it comes to soothing various physical ailments. The best part? You don’t need to be a pro to grow your collection—this plant is actually pretty easy to propagate with just a few simple steps.
Three Ways to Grow Your Lemon Verbena
When it comes to propagating lemon verbena (which is only partially hardy, by the way), you’ve got a few options. Each method has its pros and cons, depending on how much “dirt under your fingernails” experience you have. In this post, I’ll walk you through each approach in detail. And hey, once you’ve mastered growing it, try drying the leaves—you’ll have a delicious, homegrown spice ready in your kitchen year-round! Here are the three main ways to propagate:
- Starting from seed
- Taking cuttings
- Layering (the “drop-and-root” method)
Starting from Seed
If you want to get a head start, you can begin sowing seeds on your windowsill as early as February or March. Just make sure to give the seeds enough breathing room and only press them about half an inch into the soil. These guys are “light germinators,” meaning they need a bit of light to wake up, so don’t bury them deep under the dirt! You’ll want to use a well-draining potting mix for the best results.
Place your pots in a warm, bright spot, but keep them out of harsh, direct sunlight. Keep the soil consistently moist to encourage germination. After a few weeks, you should see some action! Once they’ve grown a bit, you can prick them out and move them to individual pots. Just a heads-up: growing lemon verbena from seed takes a bit of experience, a little luck, and a whole lot of patience.
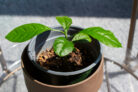
Propagating with Cuttings
Summer is the perfect time to try your hand at cuttings. Look for semi-woody branches and snip off pieces about 6 inches long. Strip the leaves off the bottom half of the cutting, and trim the remaining top leaves in half (this helps the plant focus on roots rather than foliage). Stick them into a pot filled with low-nutrient starter soil, making sure at least one pair of leaf nodes is just above the surface.
Over the next few weeks, your main job is keeping things humid. You can cover the pot with plastic wrap or a clear bag to create a mini-greenhouse effect and prevent them from drying out. Keep them in a bright, warm spot—ideally between 65°F and 77°F. As soon as you see roots starting to peek out, your new plant is ready for its permanent home!
The Layering Method
Layering is another fan-favorite method because it’s so low-stress. Starting in June, pick a flexible, one-year-old shoot and gently pull it down to the ground. Loosen the soil underneath and dig a small trench. Lay the middle section of the branch into the trench and cover it with soil, leaving the tip exposed. Use a small stone to weigh it down and keep the area nice and moist. By autumn, the branch should have its own root system and can be snipped away from the mother plant. Let the “baby” plant overwinter in a pot indoors, and you can move it out to the garden come May.