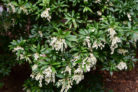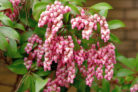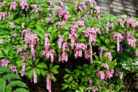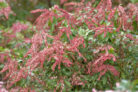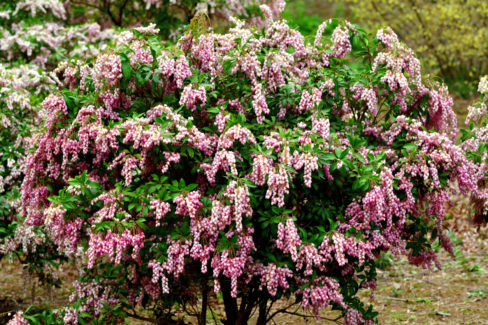
Not sure if you should give your Lily of the Valley Shrub (Pieris japonica) a trim? Worried you might accidentally hurt your beautiful evergreen? Don’t sweat it! In this guide, I’ll walk you through everything you need to know about pruning this garden favorite. We’ll cover the best timing, the right techniques, and how often you actually need to break out the shears.
Is Pruning Really Necessary?
Technically, you don’t *have* to prune a Lily of the Valley Shrub. However, if you totally ignore it, you might notice a few issues over time:
- The shrub can start looking “leggy” or bare at the bottom.
- You’ll get fewer of those iconic bell-shaped flowers.
- It becomes a bit more vulnerable to fungal infections.
Pro Tip: If you spot any signs of disease, grab your pruners immediately! Cutting away infected branches is the best way to stop the spread.
How to Prune Like a Pro
Pruning these shrubs requires a little bit of finesse. Here’s the play-by-play:
The Perfect Timing
The best time to prune is in early summer—usually June or July—right after the flowers have faded. If you miss this window, don’t try to make up for it in the fall! By September, the plant is already busy setting its buds for next year. If you cut then, you’re cutting off next spring’s flower show.
Pro Tip: If you don’t care much about the flowers and just want a thick, green screen, you can actually prune in the fall or early spring. This tells the plant to stop putting energy into blooms and start focusing on dense, bushy growth.
Light Trim or Major Haircut?
Since Lily of the Valley Shrubs are slow growers, I’d advise against a “radical” hard prune. If you cut it back to the stumps, it’s going to look bare for a long, long time. Your best bet is a regular, light trim to keep it shaped and tidy.
Double the Fun: Propagation
Don’t just toss those clippings in the green bin! You can use them to grow brand-new plants. Here’s how:
- Cut 4-inch stems just below a leaf node.
- Look for stems that are slightly “woody” (turning brown).
- Strip the leaves off the bottom half, but leave a few at the top.
- Fill a pot with seed-starting mix.
- Poke the cutting halfway into the soil.
- Once you see new green growth, it’s ready to be repotted or moved into the garden!
Safety First!
As beautiful as these shrubs are, they are toxic if ingested, and the sap can be irritating. Always wear gardening gloves and long sleeves when you’re working with them. Also, remember to disinfect your tools afterward to keep everything in your garden healthy!