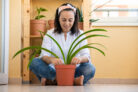
Clivias are a bit like homebodies—they really don’t like being moved around or repotted too often. However, every once in a while, your Clivia is going to need a fresh start in a new container. To make sure your plant stays happy and healthy during the transition, I’ve put together a guide on how to repot your Clivia the right way.
When is it time to repot a Clivia?
The first time you’ll need to move your Clivia is when you notice the roots are practically crawling out of the pot. This applies to store-bought plants and those you’ve propagated yourself. After that first move, Clivias generally only need fresh soil every three to four years. Whether you actually need a bigger pot or just a soil refresh depends on how much your plant has grown. Pro tip: The best time to do this is right after the flowering season ends.
Choosing the right pot for your Clivia
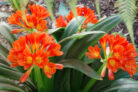
A mature Clivia can reach up to 3 feet tall, and they can get pretty top-heavy—especially when they are in full bloom. To keep your plant from taking a tumble, I recommend using a heavy container, like a classic terracotta or clay pot. Interestingly, Clivias actually bloom better when their roots are a little snug, so don’t go overboard with a massive pot. A slightly tight fit encourages those beautiful flowers!
What’s the best soil for Clivias?
Good news: Clivias aren’t too picky! Standard high-quality potting soil or even well-aged compost from your garden works just fine. The most important thing is drainage. You definitely want a pot with a drainage hole to prevent “wet feet” (root rot). To help the water flow, add a drainage layer at the bottom using:
- Broken terracotta shards,
- Expanded clay pebbles (LECA), or
- Coarse gravel.
Keep in mind that while Clivias need regular fertilizing, fresh potting soil usually comes pre-loaded with nutrients. You can hold off on feeding for a few weeks after repotting. If winter is just around the corner, you can wait until the following February to start your fertilizer routine.
What happens if you repot too often?
Clivias are creatures of habit. They aren’t big fans of change, whether it’s a new location or a new pot. They need time to settle in and get comfortable. They even dislike being rotated too frequently! If you move or repot them too often, your Clivia might refuse to bloom because it’s spending all its energy trying to adjust.
How to pot young Clivia offsets
After blooming, Clivias often produce “pups” or offsets. Once these little guys reach about 8 inches in height, they’re ready to strike out on their own. Carefully slice them away from the mother plant and tuck them into some peat-based potting mix. Even if you don’t want more plants, it’s a good idea to remove these offsets to keep the main plant’s energy focused.
Make sure to give each pup its own individual pot right from the start. This prevents the roots of multiple plants from getting tangled together and allows you to wait much longer before that first official repotting. Just like the adults, you’ll know it’s time for a bigger home once you see those roots peeking out of the bottom.