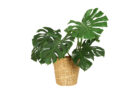
With its stunning, oversized leaves, the Monstera is definitely a showstopper. But to keep that “Swiss Cheese Plant” thriving, it needs a little room to grow. Every two to three years, your Monstera will likely need a bigger pot and some fresh soil to keep reaching for the ceiling. Not sure when or how to make the move? Don’t worry—I’ve got you covered with this guide on how to repot your Monstera the right way!
Signs It’s Time to Repot
Let’s be real: moving is stressful for everyone, and that includes your plants. Monstera are homebodies that prefer to stay put, so you only want to repot when it’s truly necessary. Usually, you’re looking at a move every two or three years. Keep an eye out for these “tell-tale” signs that your plant is feeling cramped:
- Roots are poking out through the drainage holes at the bottom.
- You see roots circling the top of the soil or pushing upward.
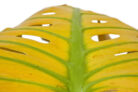
- Your plant looks a bit “blah” or has yellowing leaves, which often signals a nutrient deficiency.
Quick tip: If your plant is yellowing because the soil is spent, but it hasn’t actually outgrown the pot, you can reuse the same container! Just swap out the old dirt for fresh, nutrient-rich potting mix to give it a boost.
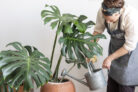
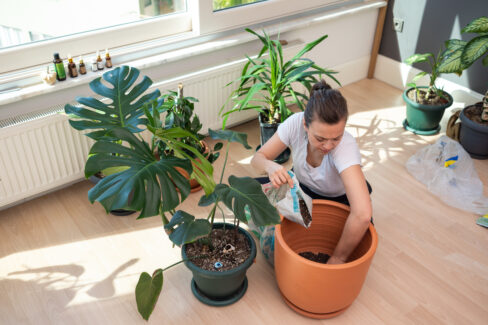
How to Repot Your Monstera Like a Pro
If you’ve decided it’s time for a change, wait until the end of winter or early spring when the plant is waking up. Grab a new pot with drainage holes and some expanded clay pebbles (LECA) for the bottom. You want a pot that’s just slightly larger than the old one—aim for about two fingers of space between the root ball and the side of the pot.
- Choose a loose, compost-based soil (like a rhododendron mix). Monstera love a slightly acidic pH, and these mixes hit the sweet spot.
- Start by placing a drainage layer of clay pebbles or broken terracotta shards at the bottom of the pot.
- Add a few handfuls of fresh soil on top of the drainage layer.
- Gently remove your Monstera from its old home and use your hands to lightly loosen the root ball.
- Place the plant in its new pot. Make sure the top of the root ball sits about an inch or so below the rim. This creates a “watering margin” so soil doesn’t spill over the sides when you water it.
- Fill in the gaps around the edges with soil, press down lightly, and give it a good drink with filtered or lime-free water.