No gardener likes looking at a patch of bare dirt. When there’s a long gap between your last harvest and your next planting, Mother Nature tends to take matters into her own hands—and usually not in a way you’ll like! That’s where “placeholder” plants come in, and one of my absolute favorites for the job is fast-growing cress.
Why you shouldn’t leave your garden beds bare
Once you’ve cleared out a crop and left the soil exposed, nature rushes in to fill the void. Usually, that means a takeover of every weed imaginable. These uninvited guests germinate, grow, and go to seed incredibly fast, making them a nightmare to get rid of later. Plus, weeds hog all the nutrients your next “real” crop will need. Beyond the weed war, bare soil is prone to erosion and nutrient washout from heavy rains. Filling that gap with a cover crop (or “catch crop”) is just smart gardening.
Why cress is a superstar cover crop
You’ve probably heard of lupines, mustard, or oil radish being used as green manure—they’ve been the go-to choices for decades. But cress is giving them some serious competition lately. Like the classics, it creates a thick carpet of leaves that protects the soil and chokes out weeds. However, cress has a few “superpowers” that set it apart:
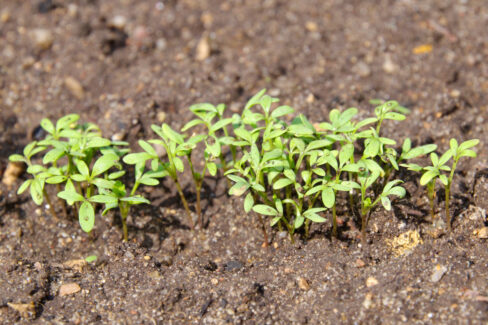
- It grows incredibly fast.
- You can sow it right up until the beginning of fall.
- You can actually eat it!
- It’s a delicious, peppery herb for salads, herb butter, or sandwiches.
Which variety should you sow?
For standard garden soil, classic garden cress works perfectly. If your soil stays on the damp side, watercress is actually the better choice; its larger leaves provide even better ground cover. Just keep in mind that if you hit a dry spell, you’ll need to water it more frequently. A quick pro-tip: cress seeds are “light germinators.” This means you shouldn’t bury them under a layer of soil. Just press them gently into the surface so they have good contact with the dirt, and you’re good to go.
Turning cress into “green manure”
Cress only needs about 2 to 3 weeks after sowing to produce its first harvestable leaves. When you’re ready to harvest, snip the shoots off at ground level. Leave the roots in the dirt! As they decompose, they naturally aerate the soil and add organic matter. If you’ve planted more than you can eat, you can simply dig the remaining plants back into the soil after they bloom. If you want to propagate your own seeds for next year, just leave a few plants alone so the seed pods can fully ripen.
Quick Tip:
Because cress sprouts so fast (usually in just 2-3 days), it’s perfect as a “marker crop.” If you’re planting something that takes forever to germinate, sow some cress in the same row. It’ll show you exactly where your rows are so you don’t accidentally hoe over your slow-growing veggies!