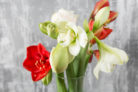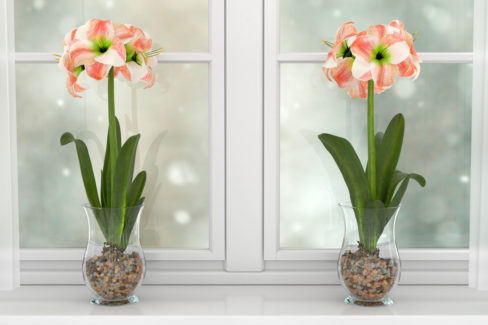
With its stunning blooms, the Amaryllis (also known as *Hippeastrum*) is the perfect way to brighten up those gloomy winter months. If you grow yours in a glass vase, you get a front-row seat to the magic of its growth—something that’s usually hidden deep underground. Here’s everything you need to know about cultivating your Amaryllis in glass.
The Best Varieties for Glass Vases
Not every Amaryllis is a good candidate for a glass home. Tall, long-stemmed varieties can get top-heavy and tip over easily. For the best results, you’ll want to stick with dwarf or smaller varieties.
Here are a few of my personal favorites for glass cultivation:
- Baby Star: This colorful exotic beauty features 3- to 5-inch red-and-white striped blooms and stays at a manageable height of about 12 to 16 inches.
- Chico: A real showstopper with dainty, spider-like petals in pink and green. It usually tops out around 12 inches.
- Papillio: This eye-catcher boasts greenish-white petals with deep burgundy markings and reaches about 16 inches in height.
Pro Tip: Look for varieties that have smaller, more delicate flowers. This keeps the weight down so your vase stays steady!
Choosing the Right Glass
You’ll find plenty of fancy (and expensive!) Amaryllis vases at garden centers, but before you splurge, check your kitchen cabinets or storage bins. You don’t necessarily need a “specialty” vase. The ideal shape is a “bulb vase”—one with a wide, rounded bottom and an hourglass-style neck that opens up at the top.
Step-by-Step: How to Plant Your Amaryllis in Glass
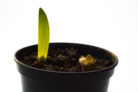
October and November are the prime months to get your bulb started. If you place it in a bright, warm spot (around 68°F), you’ll be rewarded with gorgeous flowers in about six weeks.
Before you start, grab a pair of gardening gloves! Amaryllis bulbs are actually toxic, so it’s better to be safe than sorry.
Here’s how to do it:
- Fill the bottom of the vase with lukewarm water.
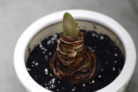
- Drop in a small piece of charcoal. This is a great trick to keep the water fresh and prevent mold.
- Place the bulb in the neck of the vase.
Crucial Step: Make sure there is about a 2-inch gap between the bottom of the bulb and the water level. The bulb should never sit directly in the water, or it will rot! You’ll get to watch the roots slowly stretch down into the water day by day. If the water starts looking cloudy, go ahead and swap it out for fresh water.
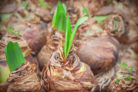
Moving to Soil After Blooming
Growing in water is a bit of a “one-time-only” performance for the bulb’s energy reserves. To keep your Amaryllis healthy for years to come, you’ll want to move it to soil after it finishes blooming. Once the flowers fade, transplant the bulb into a mix of potting soil and cactus grit. Make sure the top half of the bulb is still peeking out above the soil line. Don’t forget to trim off the spent flower stalks.
A Little Decorating Tip
Try tucking a few dark birch or willow twigs into the glass around the bulb. Not only does this give the flower stalk a little extra support as it grows, but it also looks incredibly chic and natural!