Growing Amaryllis from seed is always a bit of a surprise! Like many other specialty plants, these fancy hybrids don’t grow “true to seed” when you propagate them. This means most of your home-grown mini plants will revert back to their wild roots, usually sporting classic red blooms. If you’re ready for a little garden mystery, here’s how to harvest and sow your own Amaryllis seeds.
Amaryllis seeds are fast germinators
Once those elegant blooms start to fade, some plants will begin to develop seed pods. You can easily harvest and plant these yourself, but timing is everything! If you wait too long, the pods will dry out completely and scatter their paper-thin seeds everywhere, making them a real pain to collect.
Here’s the game plan:
- Snip off the pods while they are still closed. The perfect time is when they start turning a slight yellowish color.
- Carefully pop open the casing and spread the seeds out on a clean paper towel.
Amaryllis seeds like to get moving quickly, so don’t let them sit around. For the best results, aim to plant them about 3 days after harvesting.
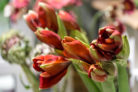
It’s a floral grab bag
Since most store-bought Amaryllis are specialized hybrids, their offspring won’t look exactly like the parent plant. In the world of Amaryllis genetics, red is the dominant “boss” color. Because red is the original shade of the wild species, that’s usually what you’ll get in your new seedlings.
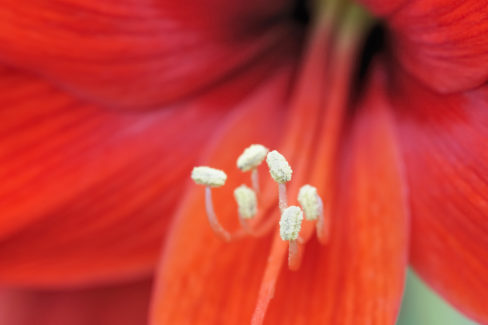
Give nature a helping hand with pollination
Since our living rooms are usually lacking helpful guests like bees or butterflies, you’ll need to play Mother Nature yourself to make sure the plant actually produces seed pods.
How to hand-pollinate:
- When your Amaryllis blooms open, grab a cotton swab and collect some pollen.
- Dab that pollen onto the pistil (the center part) of a second blooming plant.
- To keep things controlled, you can remove the petals and loosely cover the pollinated flower with a small paper bag.
- Secure the bottom of the bag with a little tape.
- Once you see the base of the flower start to swell, you can take the bag off.
Success with sowing
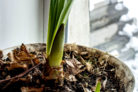
Once you’ve harvested your seeds, fill a seed tray with a low-nutrient starter mix. Scatter the seeds on the surface and lightly dust them with a bit of sand. Give them a good watering and cover the tray with clear plastic wrap to create a mini greenhouse. Place the tray in a bright, warm spot.
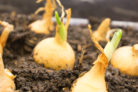
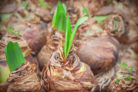
Keep those seedlings hydrated
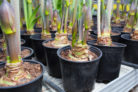
Your fresh seeds need plenty of moisture to get started. Usually, you’ll see green shoots popping up in about 10 days. Once the first little leaves are a few inches long, you can move the youngsters into their own individual pots. After about a month, you can start fertilizing them.
A pro tip to wrap up
Unlike mature Amaryllis bulbs, don’t let your baby plants go dormant or dry out during their first year. Keep them indoors year-round and keep up with regular watering to help them build up their strength!