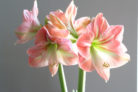
Growing your own Amaryllis is a dream for many home gardeners, and honestly, with a little bit of insider knowledge, it’s totally doable! There are two tried-and-true methods for propagating these beauties. Whether you want to try your hand at starting from seed or using “bulblets,” here’s everything you need to know to get those young plants thriving.
How to Grow Amaryllis from Seed
To get your Amaryllis to produce seed pods, you’ll need to play matchmaker and pollinate the flowers yourself. Since we don’t usually have bees buzzing around our living rooms, you can just give the stems a gentle shake every now and then to spread the pollen. If you want to be extra sure, grab a small paintbrush or a Q-tip and manually transfer the pollen to the stigma.
Once the petals start to fade and the base of the flower begins to swell, you’ll know the seeds are developing. It takes about six weeks for the fruit to ripen. When the pods start to crack open, it’s time to harvest the seeds. Let them dry for about three days, and then follow these steps:
- Fill small pots with a high-quality seed-starting mix and dampen it slightly.
- Space the seeds about 2 inches apart on top of the soil. Just press them down gently—don’t bury them!
- Create a mini-greenhouse by covering the pots with clear plastic wrap or a plastic bag.
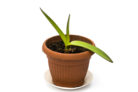
Place your pots in a spot with indirect light and keep the temperature around 68°F (20°C). You should see sprouts in about three weeks. Keep the soil consistently moist and make sure to lift the plastic cover daily to let in some fresh air. Once the seedlings are about 2 inches tall, you can ditch the plastic cover for good. Pro tip: Keep these youngsters growing year-round without a fall dormant break until they reach flowering size.
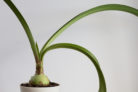
Propagating with “Bulblets” (Offset Bulbs)
If you’re looking for a faster and more foolproof method, propagating via bulblets (the tiny baby bulbs that grow off the side of the main one) is the way to go. Here’s the game plan:
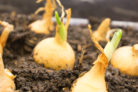
- Wait to separate the bulblets from the mother plant until they are at least 1.5 to 2 inches in diameter.
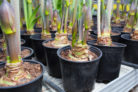
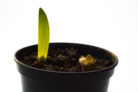
- Pot them up in seed-starting mix, making sure the bulb is only halfway buried in the soil.
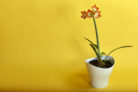
Place them in a warm, bright spot (out of direct sun) and water them regularly. Once the bulbs have grown to about 4 inches in diameter, it’s time to move them into a larger pot with fresh soil and start your standard care routine. To keep your plant growing straight and tall, give the pot a 45-degree turn every couple of days so it doesn’t lean toward the light!